Connecting a sensor to the M12 connector on Logger WD-68 and 4WD
Download as PDFLogger WD-68 and Logger 4WD use a standardized M12 connector that lets you connect sensors in a plug-and-play fashion.
Sensors provided directly by Consibio have this connector attached by default. You can also attach the connector to third-party sensors and use the same plug-and-play functionality. The specification for the M12 connector is defined below.
M12 sensor plug specification
Section titled “M12 sensor plug specification”Plug specification
Section titled “Plug specification”Any M12 plug with the specifications below should work with the Logger.
| Parameter | Value |
|---|---|
| Connector | M12 |
| Pins | 8 |
| Coding | A |
| Gender | Female |
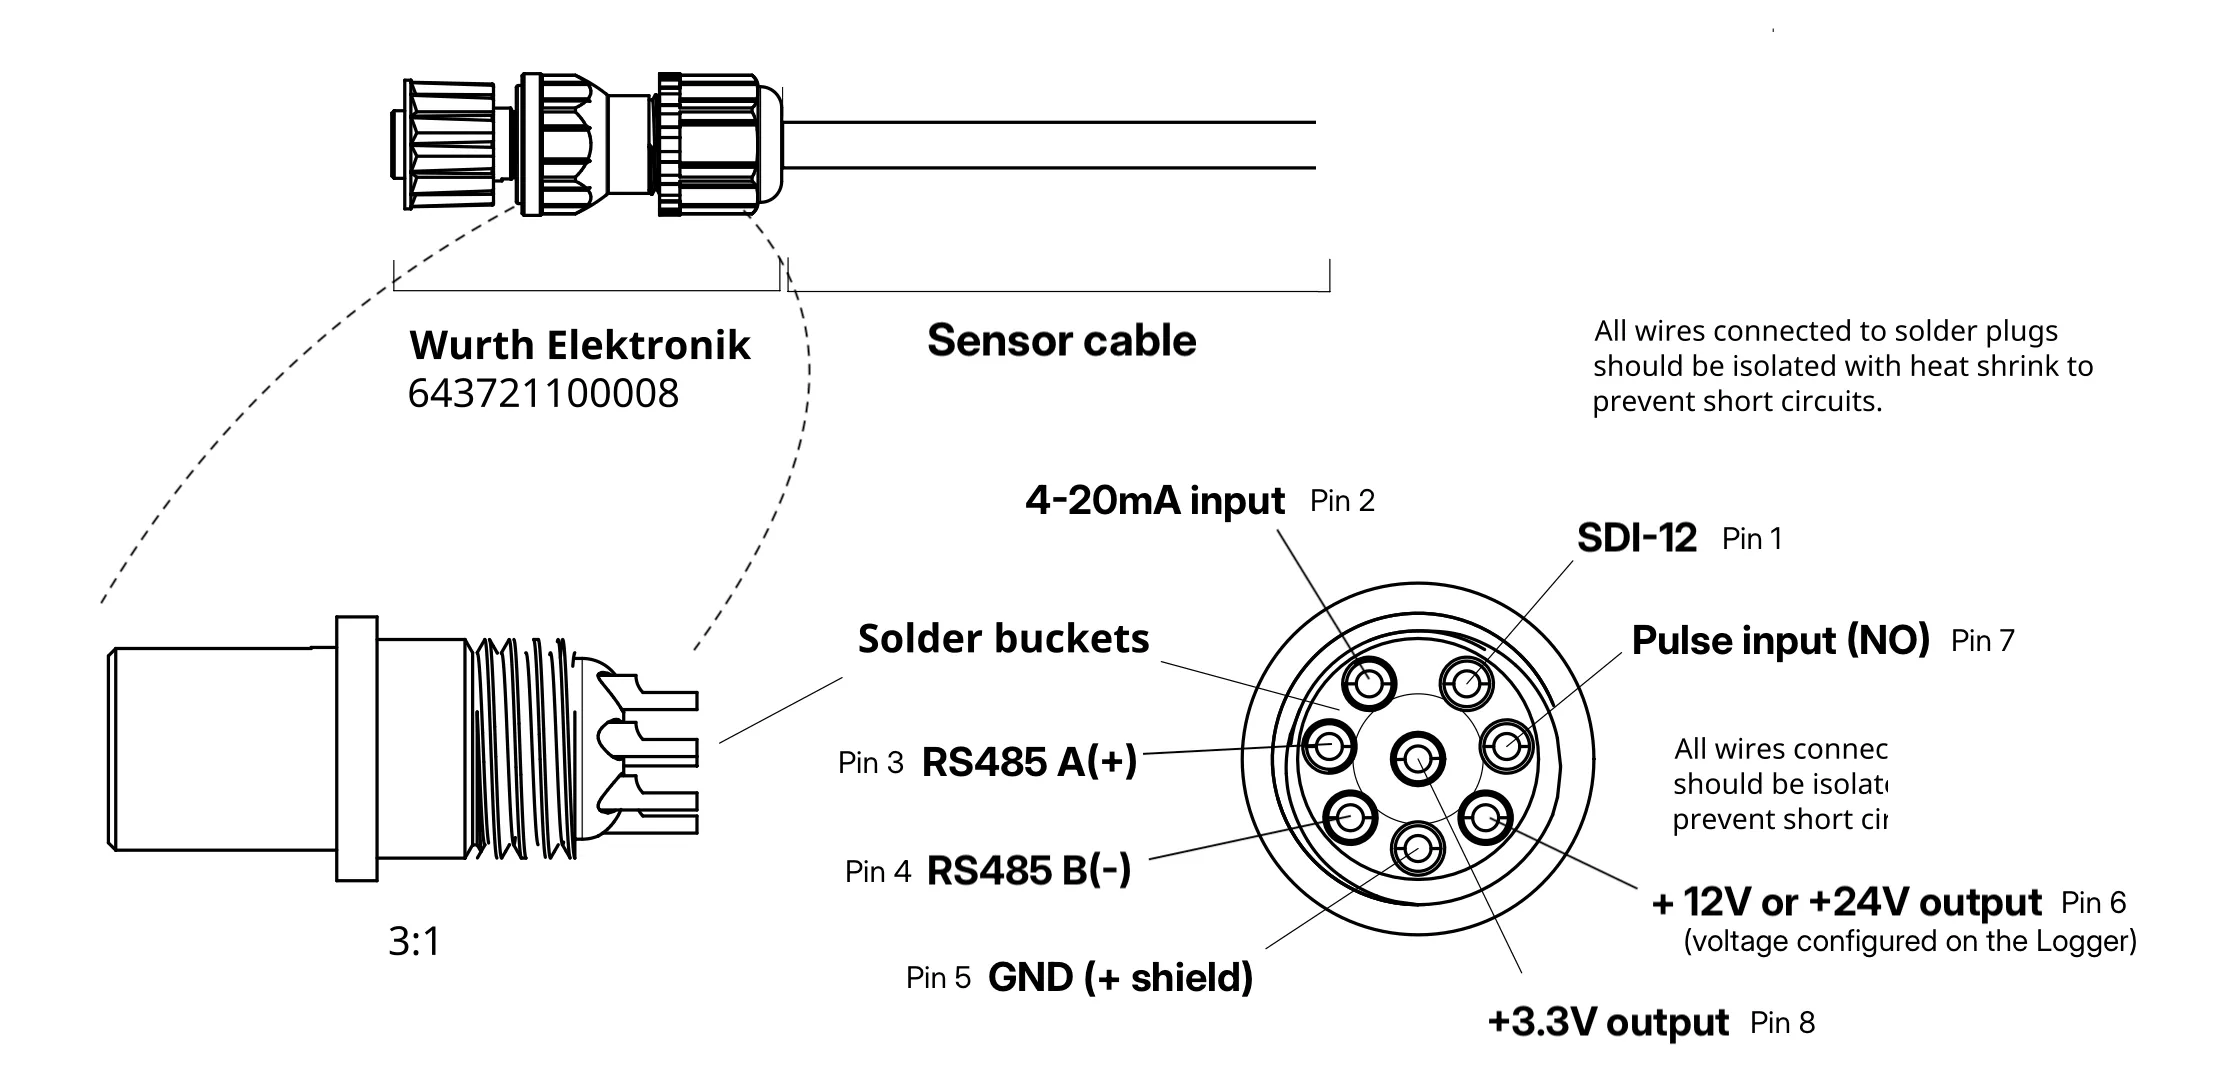
We suggest the part 643721100008 from Würth Elektronik. It requires soldering, but has a high IP rating (IP68). If lower IP ratings can be tolerated, other screw-type connectors can also be used.
Signal lines
Section titled “Signal lines”| Pin no. | Signal |
|---|---|
| 1 | SDI-12 |
| 2 | 4-20mA input |
| 3 | RS485 A(+) |
| 4 | RS485 B(-) |
| 5 | GND (+ shield) |
| 6 | +12 or +24V output for sensor supply (configured on the Logger) |
| 7 | Pulse input (NO, Normally Open) |
| 8 | +3.3V output for sensor supply |
Mounting the 643721100008 M12 sensor plug
Section titled “Mounting the 643721100008 M12 sensor plug”This guide refers to the suggested M12 sensor plug: 643721100008 from Würth Elektronik.
To mount the M12 sensor plug, follow the steps below:
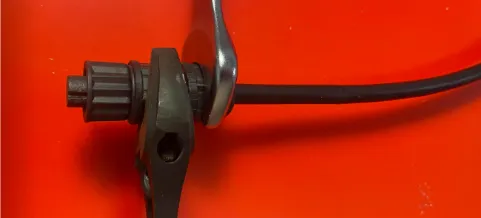
-
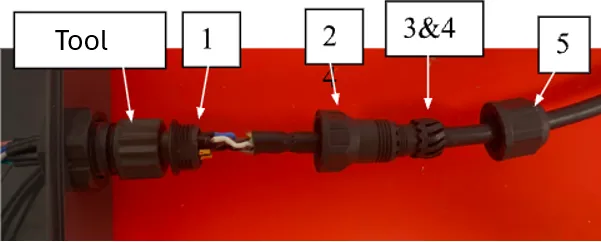
Install the sensor plug onto the “Tool”, the counterpart of the sensor plug.
-
Screw part “2” onto part “1”.
-
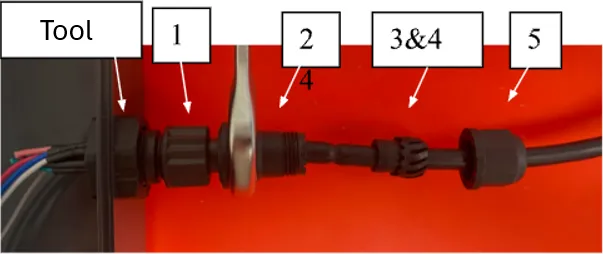
Unplug the sensor plug from the tool. Install the two gaskets (part 3 and part 4) onto part 2.
-
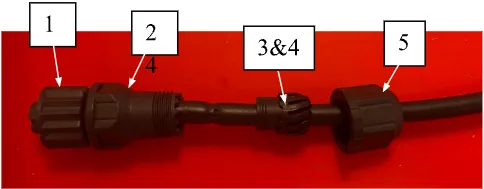
With the two gaskets aligned properly between part 2 and part 5, screw these together.
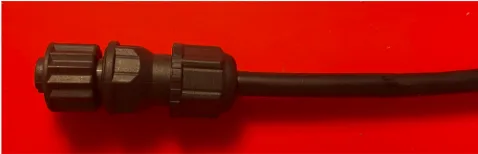
The fully assembled M12 sensor plug is shown below.
If you run into trouble wiring or mounting the connector, contact support@consibio.com.