Installing the Rain Gauge solution
Download as PDF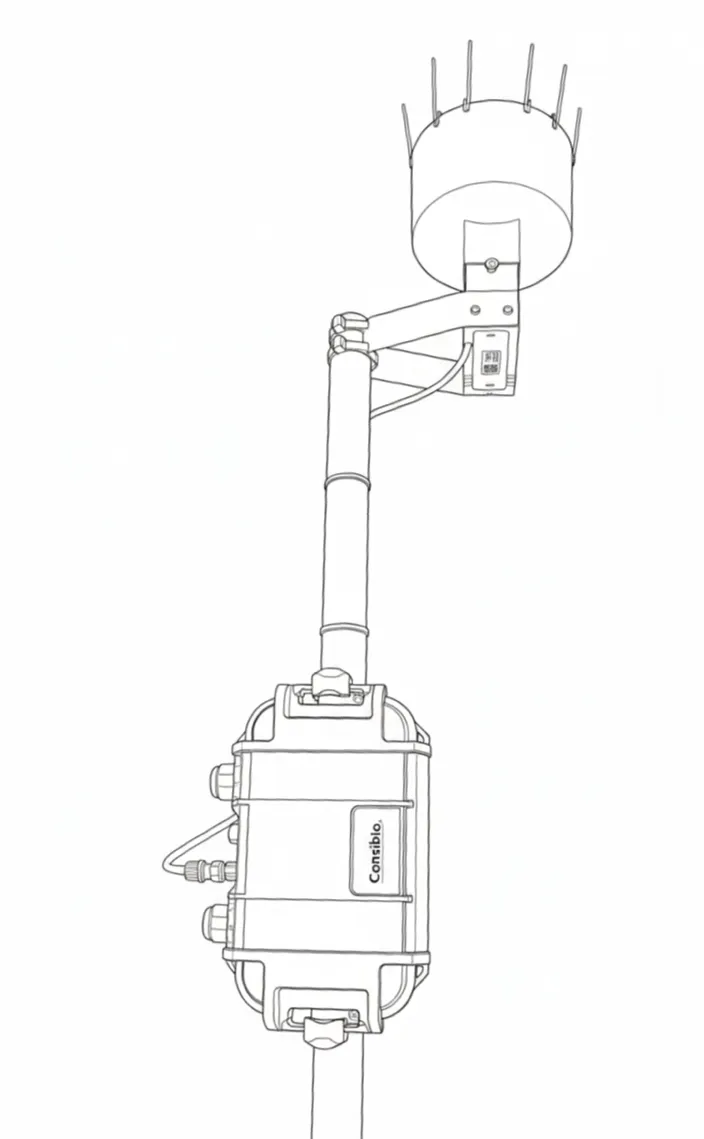
Equipment
Section titled “Equipment”The Consibio Rain Gauge solution consists of all the equipment and accessories needed to install a rain precipitation monitoring system:
- Logger WD-68 battery-driven cellular datalogger
- Rain Gauge
- Leaf grid and bird spikes for rain gauge
- Brackets for mounting the rain gauge on a pole
- Mounting brackets for mounting the Logger on a pole
1. Activate Deploy Mode
Section titled “1. Activate Deploy Mode”The first thing to do when arriving on the site of installation is to activate Deploy Mode on the Logger:
- Press “Restart” shortly.
- Hold “Deploy Mode” for approximately 5s. When the LEDs flash quickly one at a time in a repeating pattern, Deploy mode is activated.
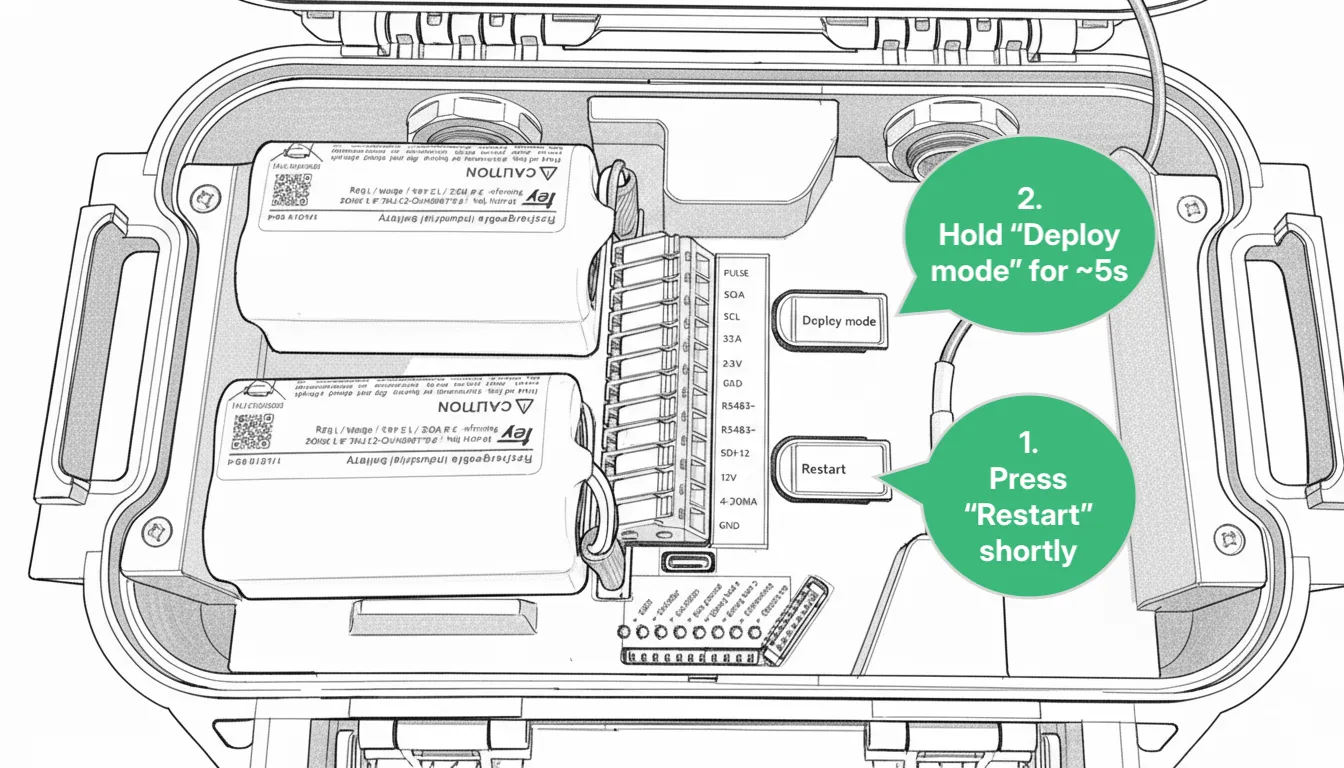
For the next 1 hour, the device will make a measurement every 30s and transmit every 5mins. After 1 hour, it will revert to the transmission and measurement interval configured in Consibio Cloud.
We activate this as the first step to make the Logger start connecting immediately, where it will scan the local network operators and select the most optimal one. On the first attempt, this can take some minutes.
2. Mounting instructions
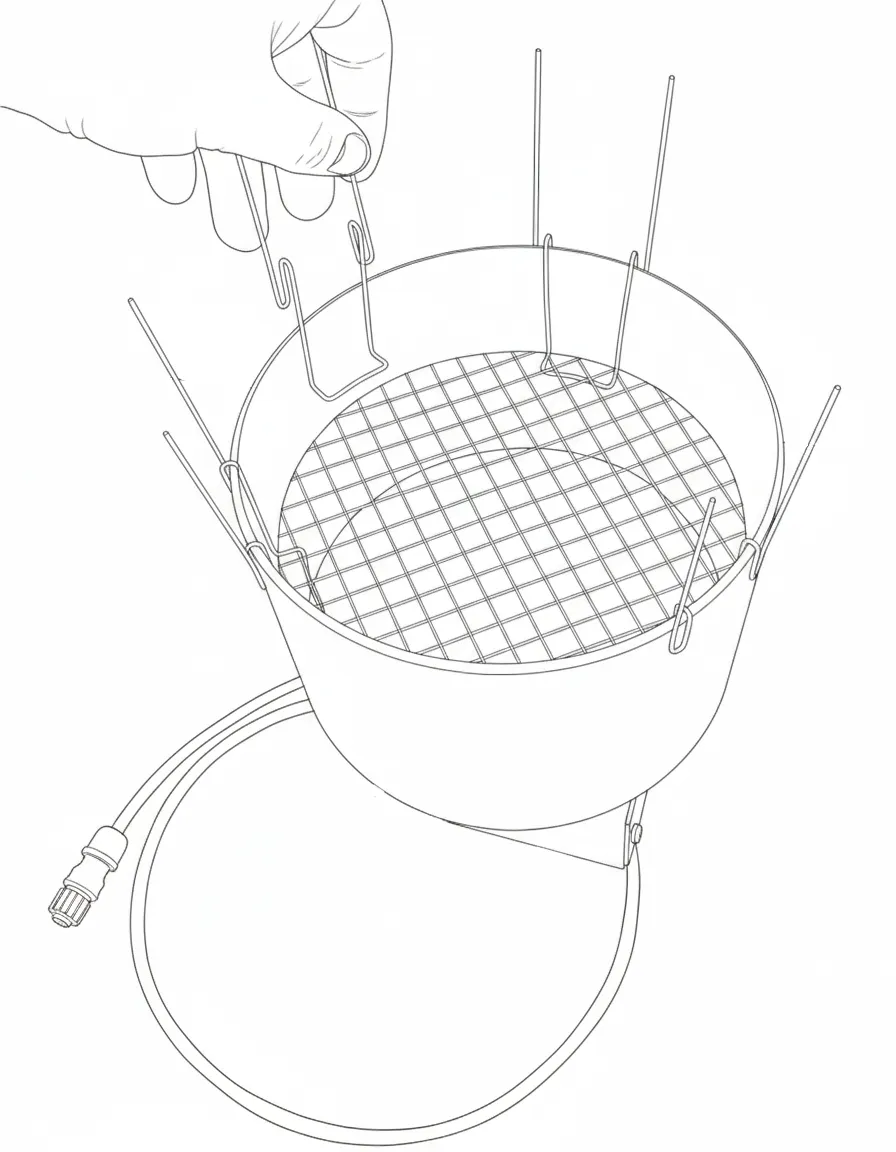
Section titled “2. Mounting instructions”2.1 Install bird spikes and leaf grid on rain gauge
Section titled “2.1 Install bird spikes and leaf grid on rain gauge”The bird spikes and leaf grid are not mounted on the rain gauge during shipping, so these should be installed first. Install the first 3 bird spikes by pushing them over the side of the rain gauge. They should be positioned at 12 o’clock, 4 o’clock and 8 o’clock.

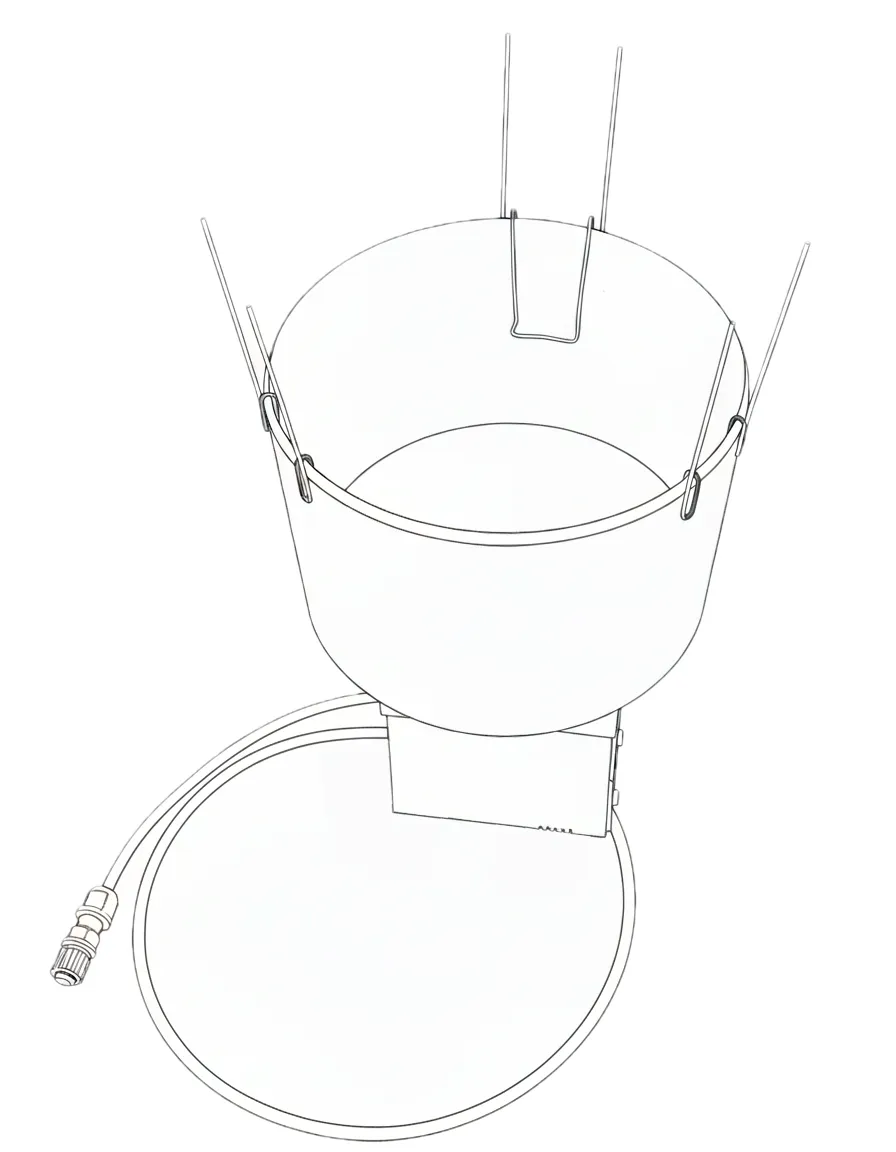
Next, place the leaf grid on top of the bottom holders of the spikes:
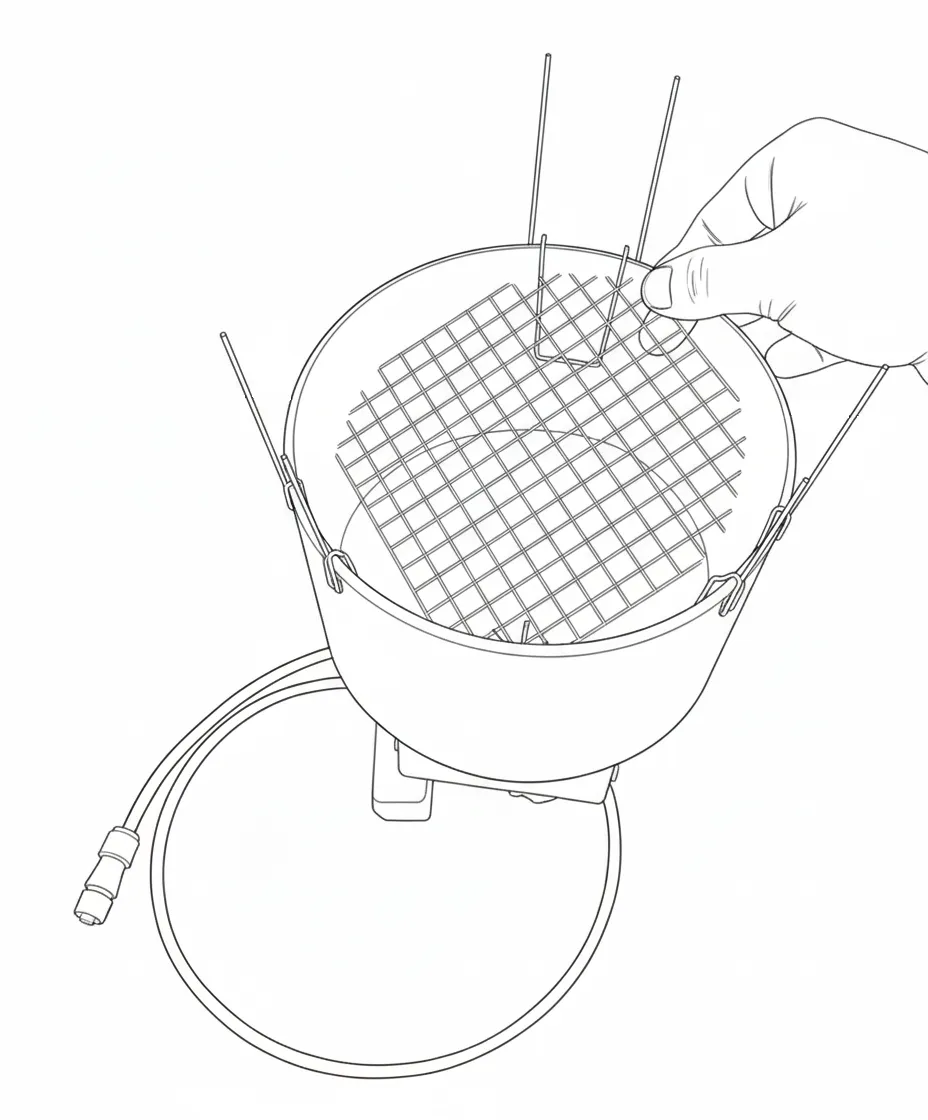
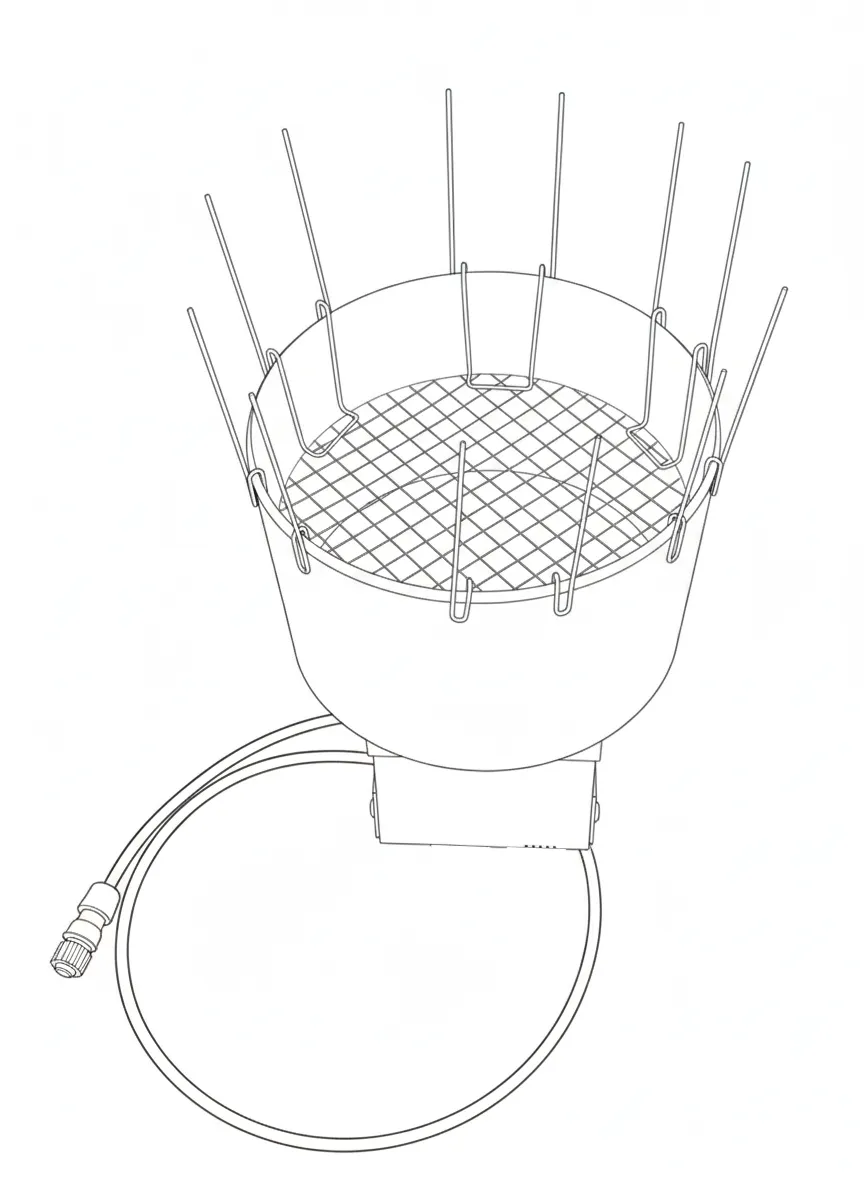
Now install the rest of the spikes on top of the grid, locking it in place:
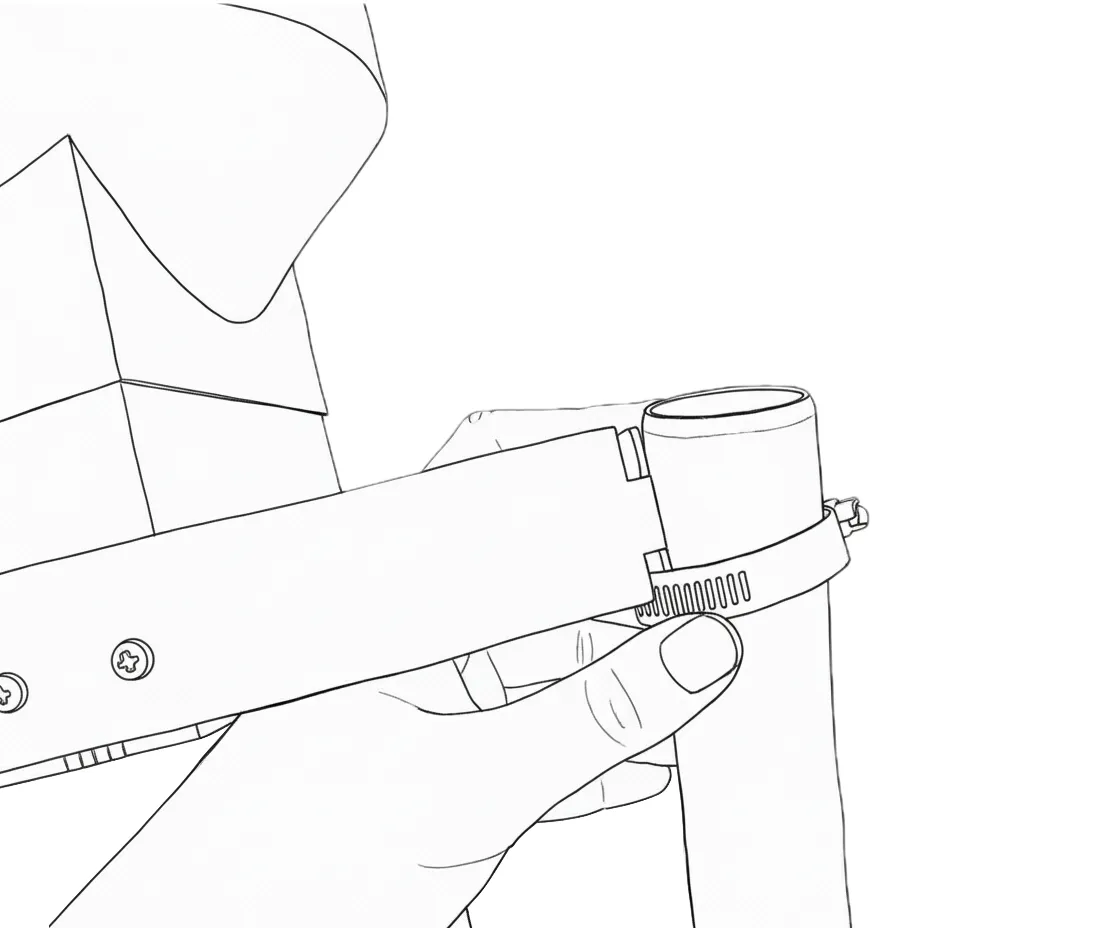
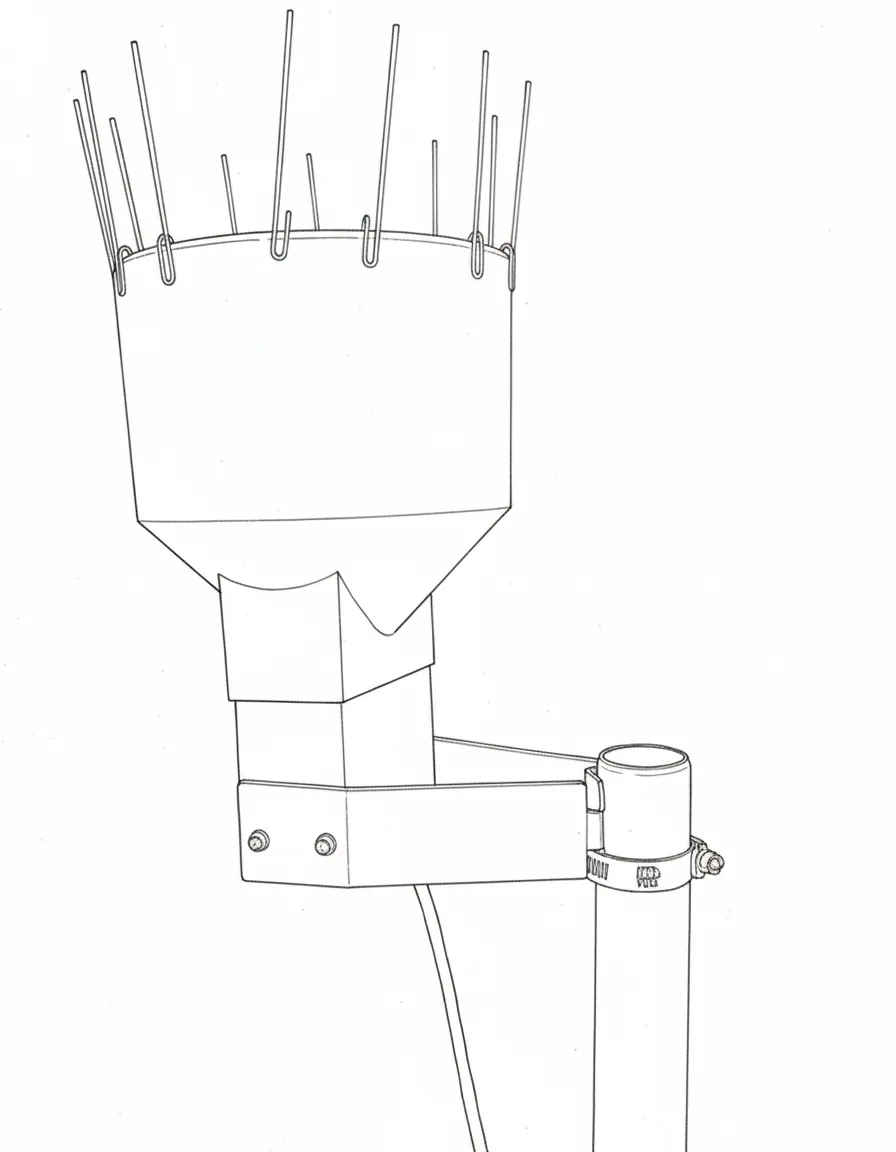
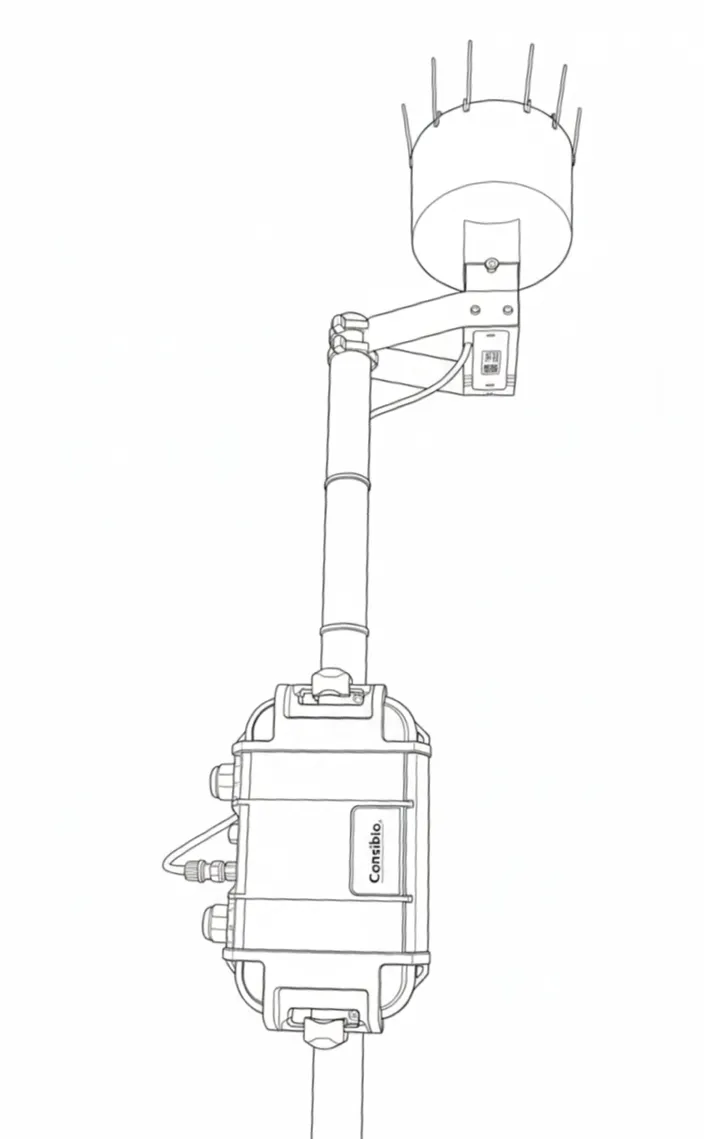
2.2 Mount the rain gauge on a pole
Section titled “2.2 Mount the rain gauge on a pole”The rain gauge should be mounted on an appropriate pole (the pole is not included in the kit). For the most accurate rain metering, keep the following best practices in mind for the installation:
- The gauge should be mounted at least 1m / 3ft above the ground to avoid collecting any splashes.
- Mount the gauge as far as possible from walls, trees or other obstructions that might limit the free path of rainfall into the gauge.
- The gauge should be level after installation.
Mount the gauge on the pole using the included bracket and a worm drive clamp that fastens the bracket onto the pole:
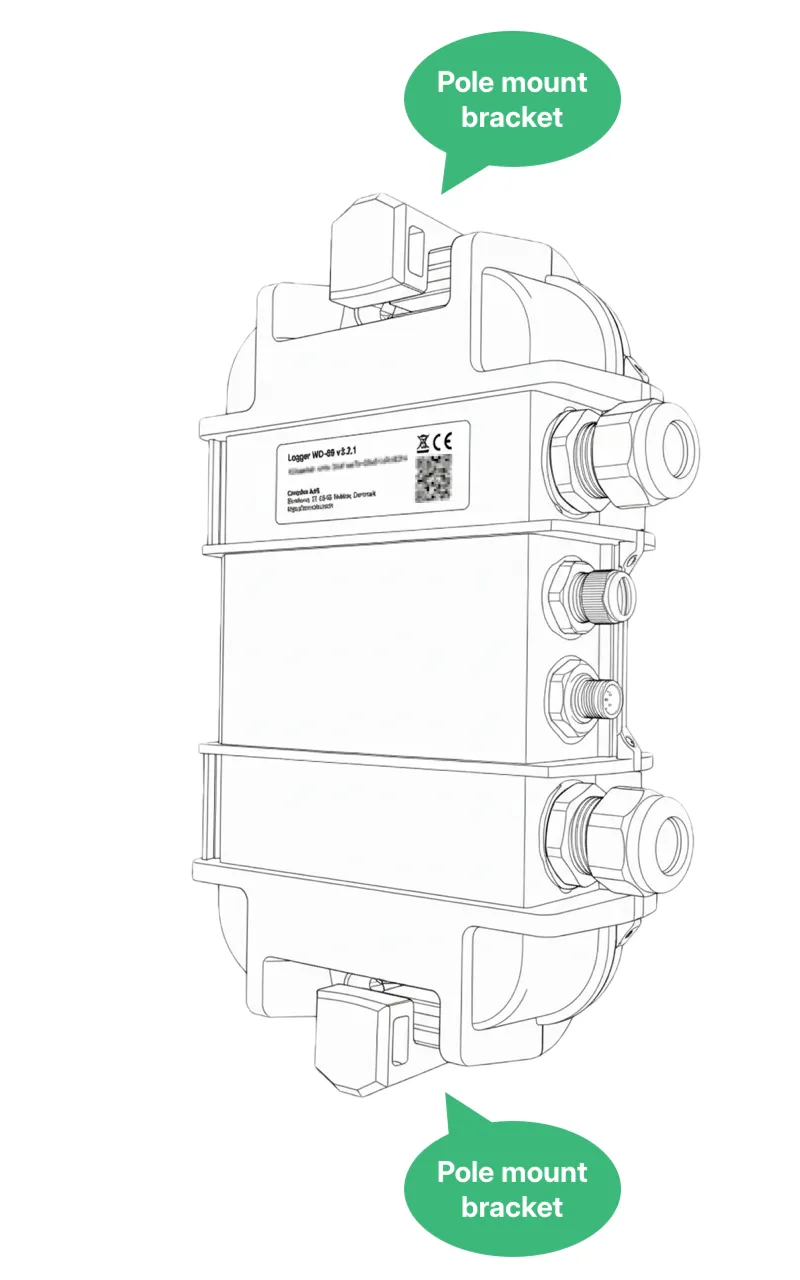
2.3 Attach pole mount brackets to the Logger
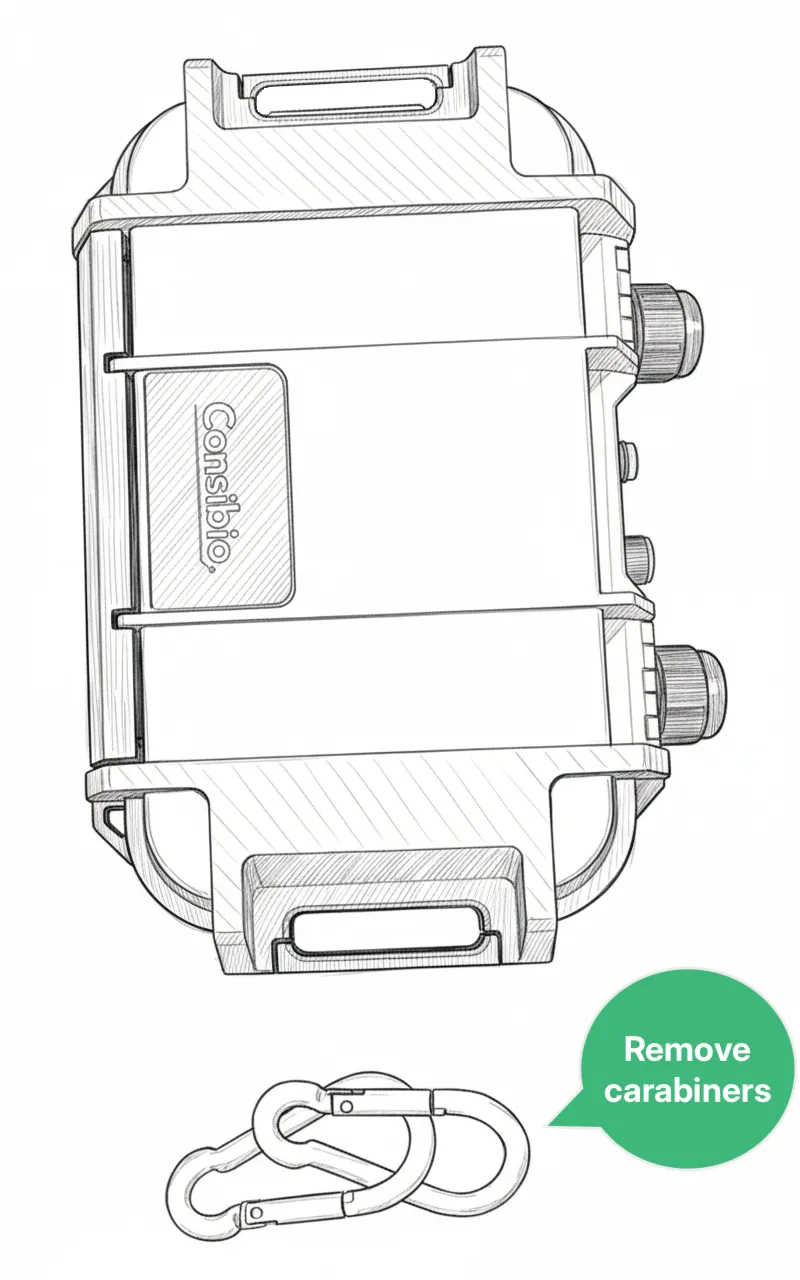
Section titled “2.3 Attach pole mount brackets to the Logger”Take off the carabiners attached to the Logger:
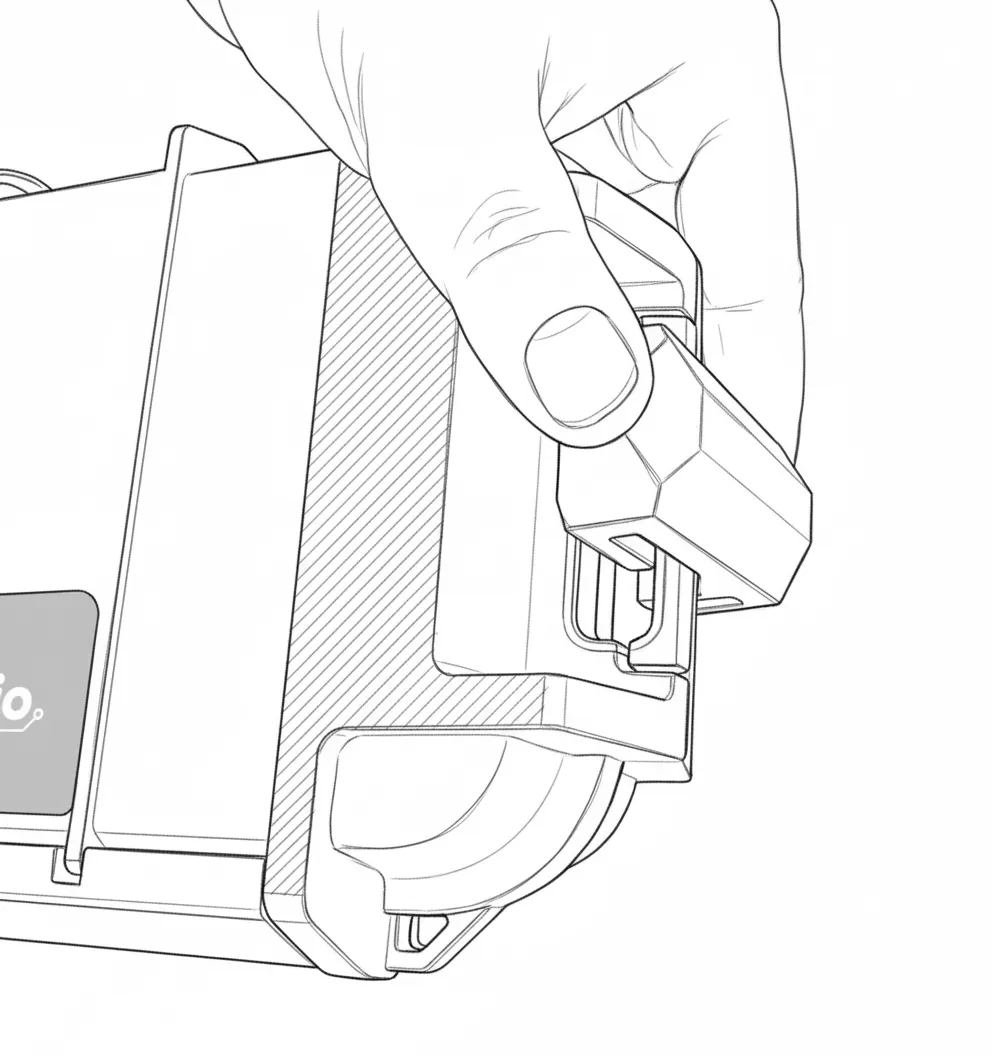
Install the pole mounting brackets for the Logger included with the rain gauge pack. Push the bracket over the bar on the side of the Logger and push it all the way down:
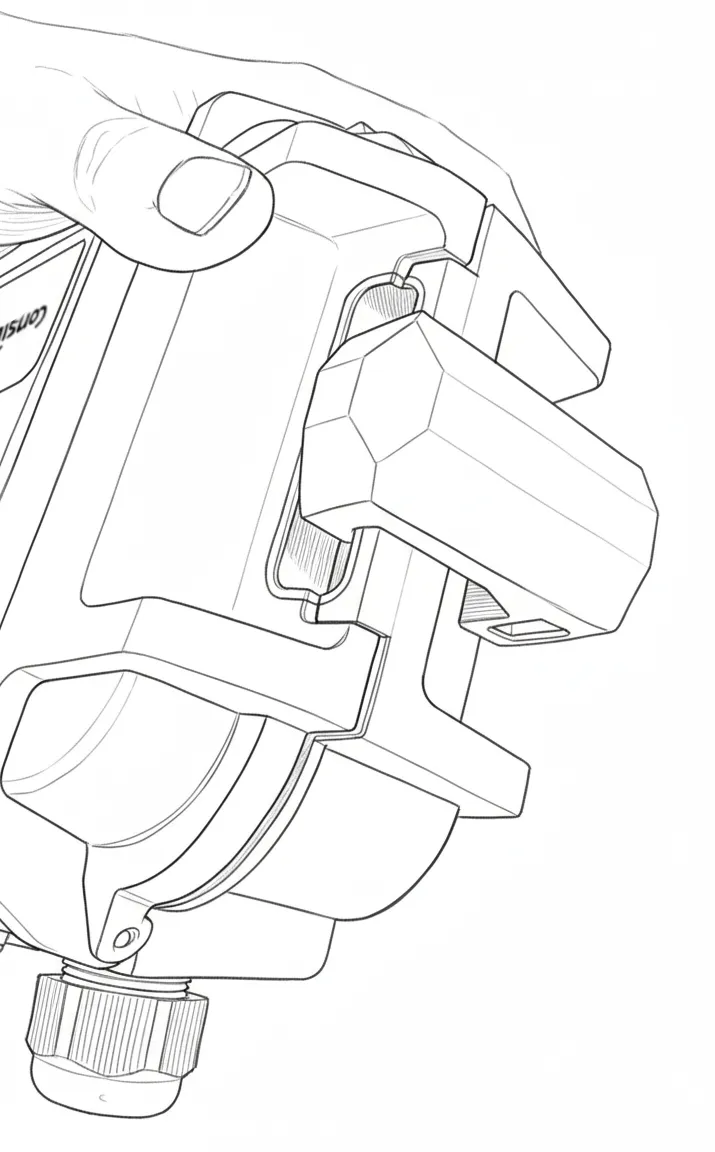
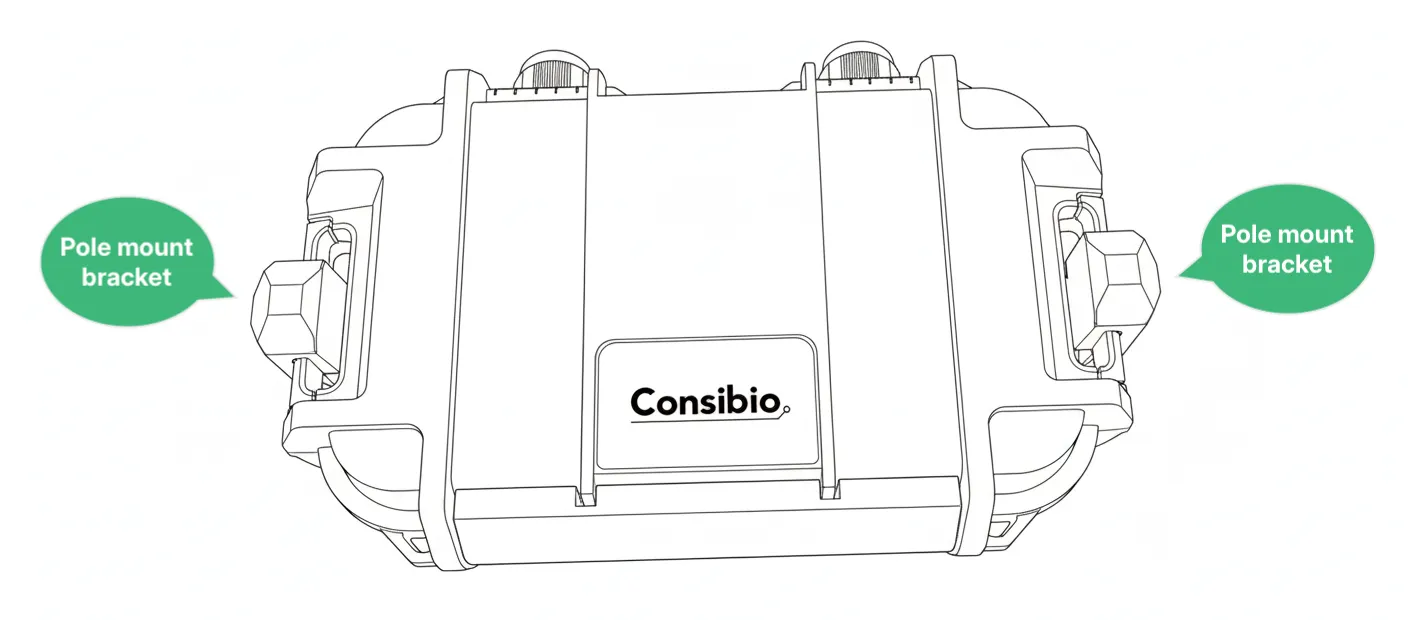
Now do the same for the other side, so a bracket is mounted on both side bars of the Logger:
2.4 Mount the Logger on the pole
Section titled “2.4 Mount the Logger on the pole”Insert a worm drive clamp through the slot in both pole mount brackets:
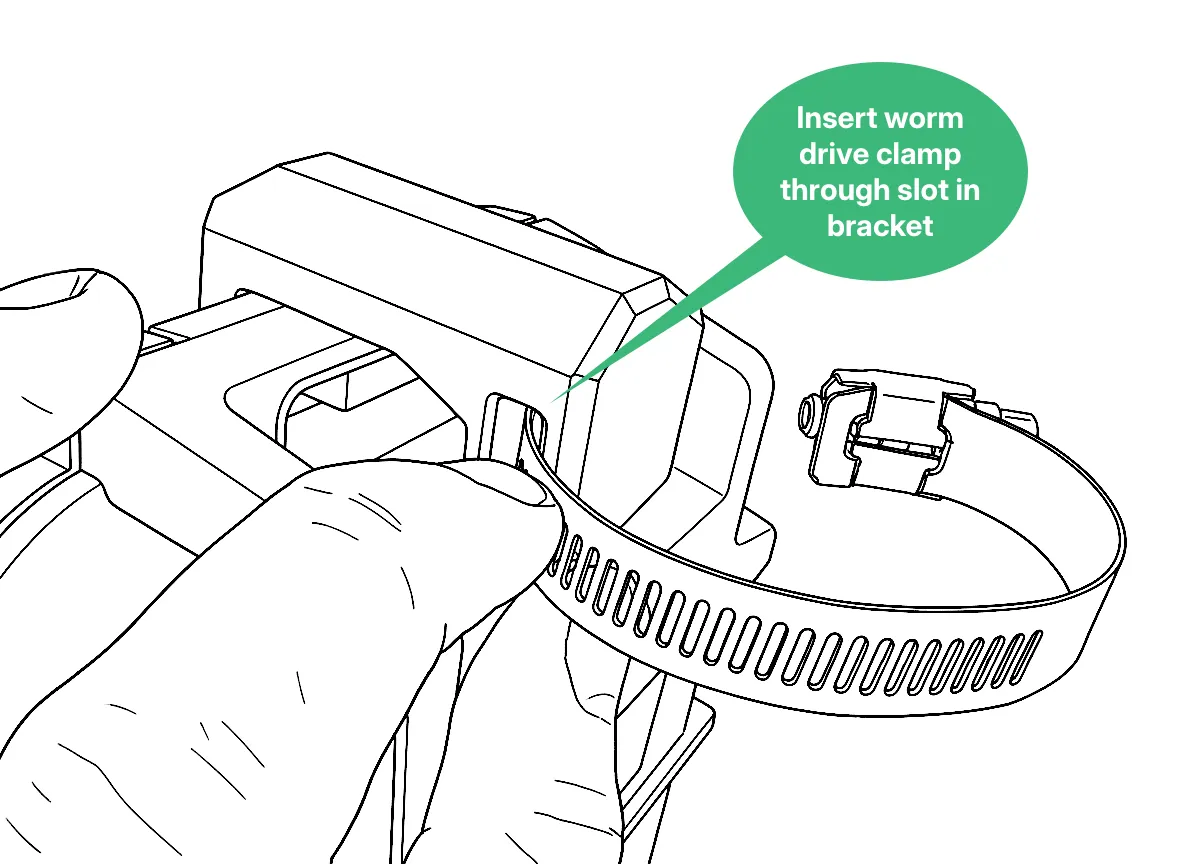
Route the worm drive clamp around the pole and fasten it.
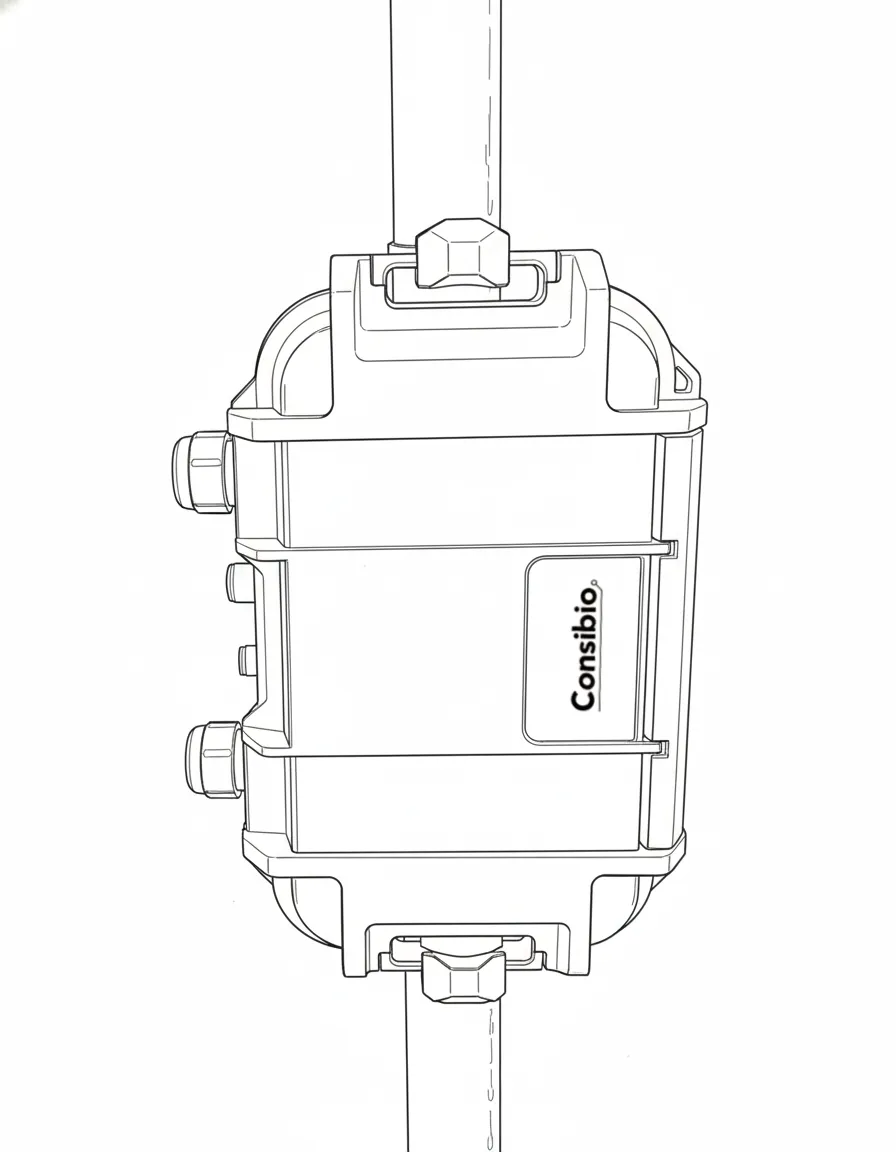
It’s important not to fasten it too tight. Try fastening it bit by bit while assessing if the Logger is properly secured. Once it’s no longer easily movable by hand, the clamp is sufficiently tight.

Repeat the process for the pole mount bracket at the bottom of the Logger so it’s mounted on both the top and bottom:
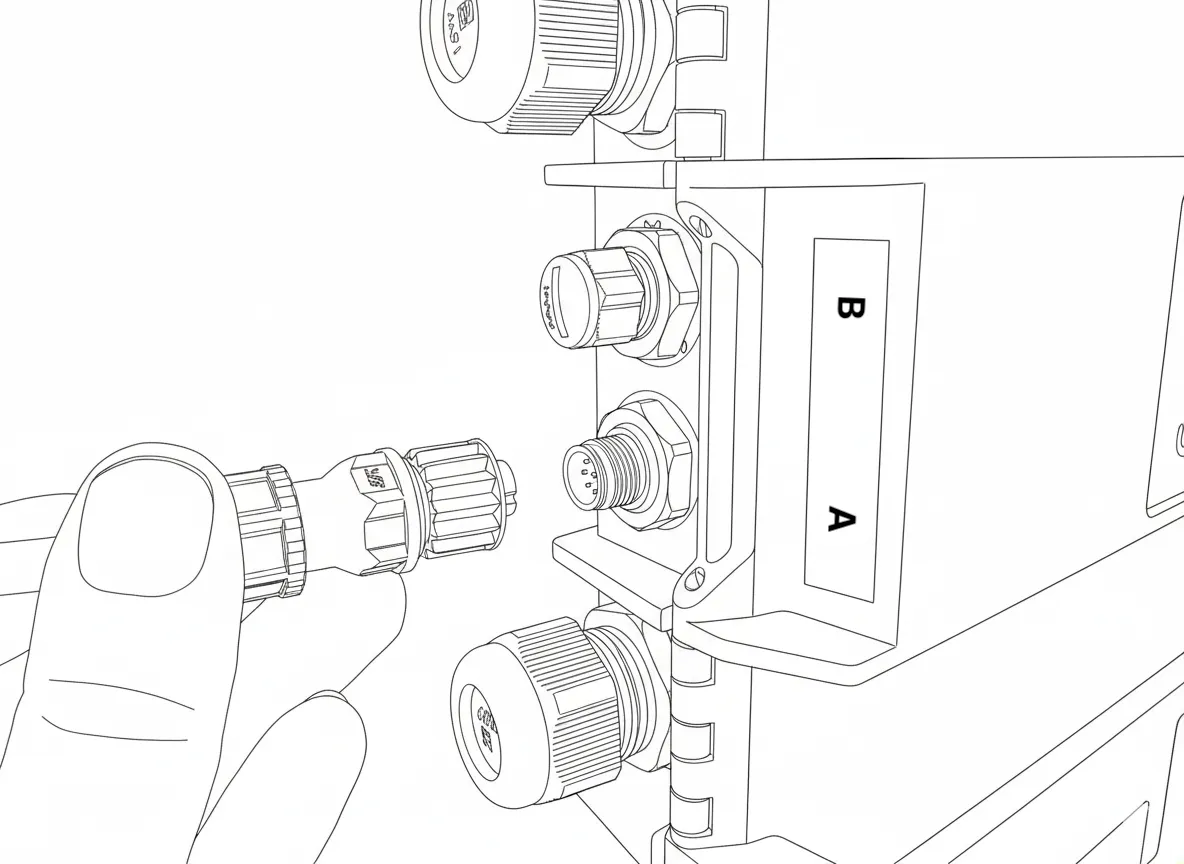
2.5 Connect rain gauge cable to Logger
Section titled “2.5 Connect rain gauge cable to Logger”Connect the cable from the rain gauge to the Logger. Connect it to port A, unless otherwise specified:
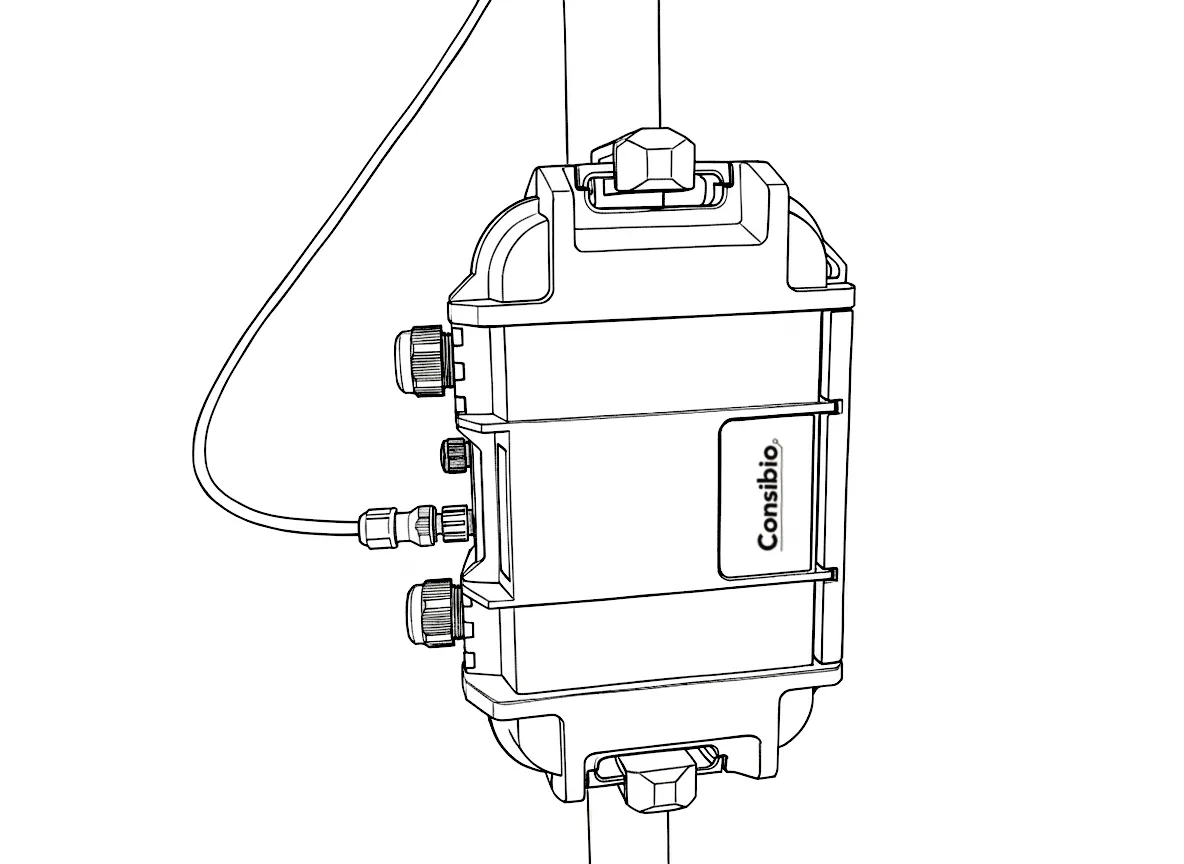
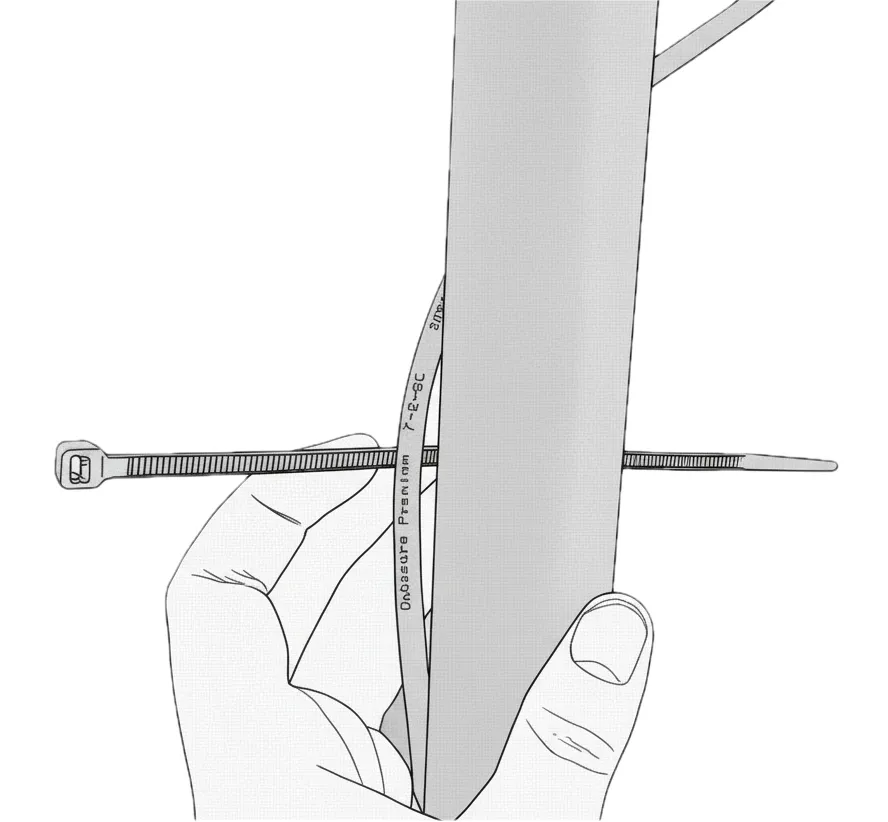
2.5.1 Fasten the cable
Section titled “2.5.1 Fasten the cable”Fasten the cable to the pole with zip ties to ensure a clean installation:
Now the installation is complete!
3. Verify installation and data quality
Section titled “3. Verify installation and data quality”After installation is complete, check that the Logger transmits data correctly.
We activated Deploy mode in the first step, so the Logger has since then attempted to connect every 5 minutes. Before leaving the site, verify that the Logger transmits correctly, so it’s important to wait long enough to check this.
Go to https://v3.consibio.cloud on a smartphone or laptop, open your project and check that the most recent measurement is recent — the most recent datapoint should have been recorded within the last couple of minutes.
If you don’t get a signal from the Logger, try:
- Activating deploy again, according to the instructions in step 1.
- Moving the Logger as far away from large metal objects as possible.
- Relocating the equipment to another location.
Reach out to support@consibio.com if you need assistance.