

Calibrating the H2S sensor
Download as PDFThe Consibio H2S sensor is engineered for robustness and long-term stability. In most applications you don’t need to calibrate the sensor more than once or twice per year during service (which is part of the optional service agreement for the sensor).
For applications that require the highest level of precision, you can calibrate the sensor whenever you want. This guide describes how.
For the details of the calibration tool used in the last step, see Calibrating a sensor.
Preparations
Section titled “Preparations”Activate Deploy Mode
Section titled “Activate Deploy Mode”The first thing to do when you arrive on site is to activate Deploy Mode on the Logger:
- Press Restart shortly.
- Hold Deploy Mode for approximately 5s. When the LEDs flash quickly one at a time in a repeating pattern, Deploy Mode is activated.
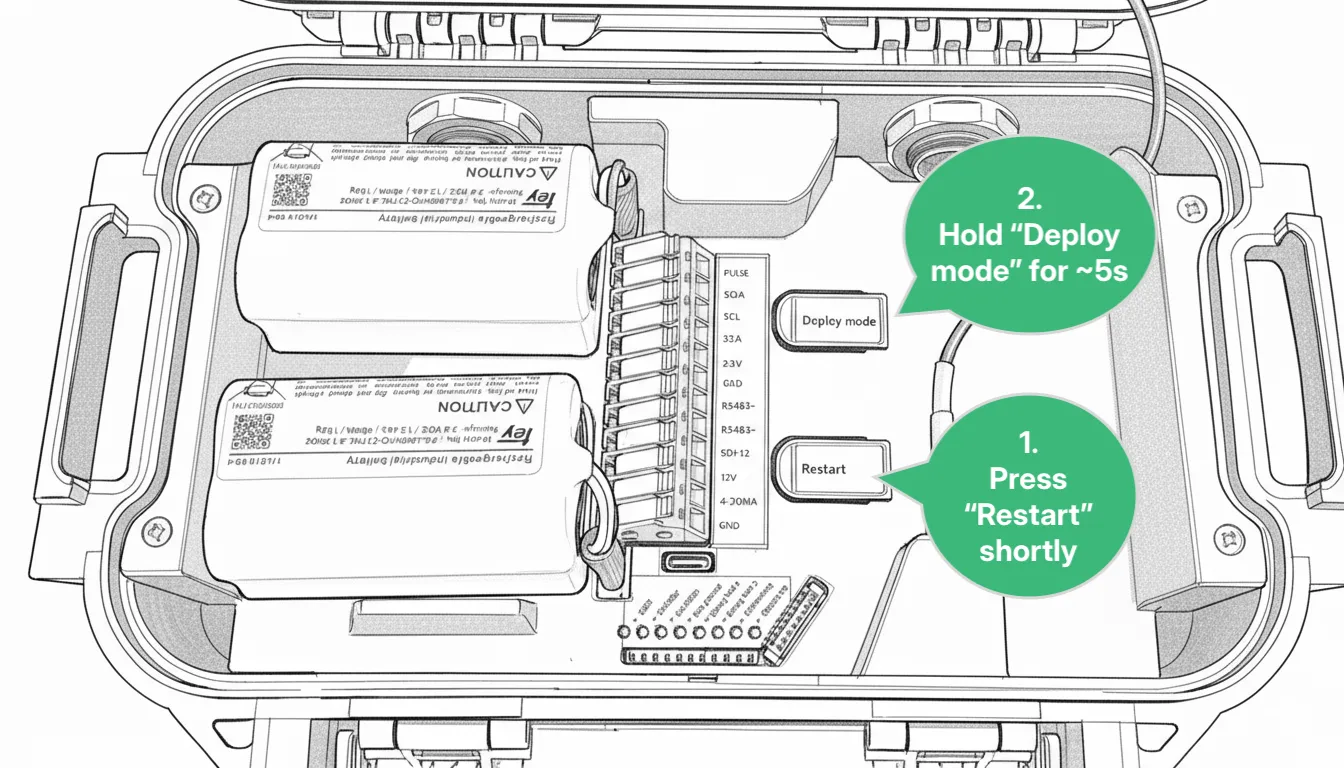
For the next 1 hour, the device makes a measurement every 30s and transmits every 5 mins. After 1 hour, it reverts to the transmission and measurement interval configured in Consibio Cloud.
Activate Deploy Mode first so the Logger starts measuring immediately and sends the data with minimal delay.
Apply the calibration standard
Section titled “Apply the calibration standard”Ensure a stable baseline
Section titled “Ensure a stable baseline”When the sensor is first connected, it takes a little time to reach equilibrium. If the sensor was just connected to a Logger, or the Logger was just powered up, wait at least 10 mins. If the sensor has been connected for a while and the Logger is already powered up, you can skip this step.
Apply gas from a cylinder with a calibration standard
Section titled “Apply gas from a cylinder with a calibration standard”If a cable hanger is attached, remove it first.
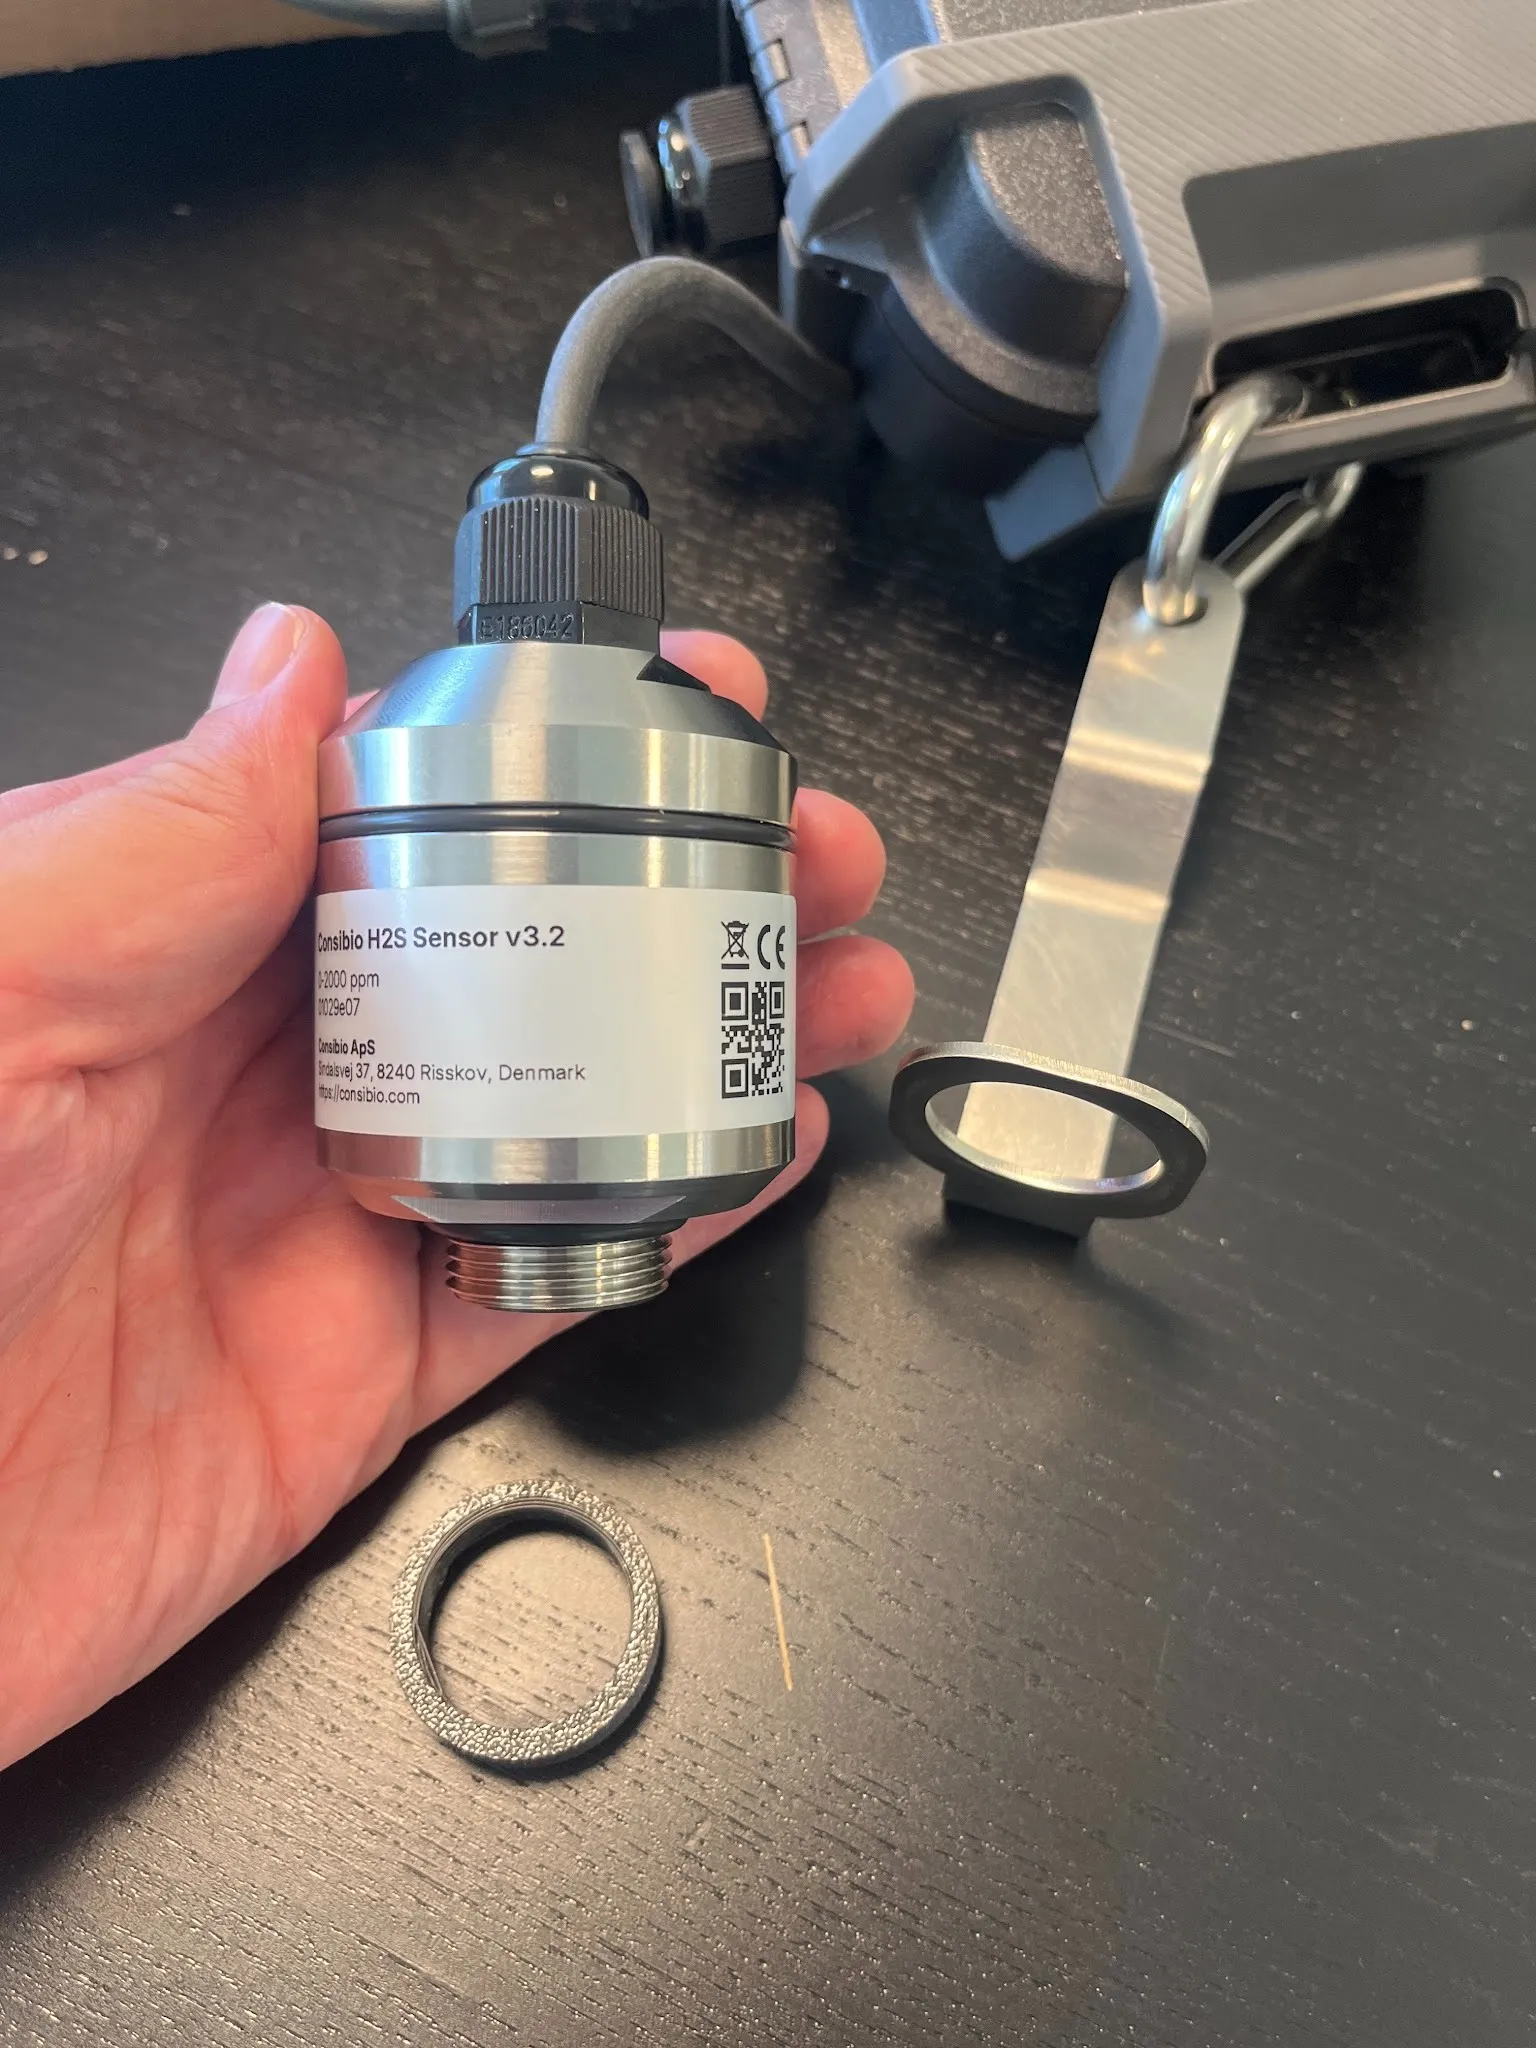
Attach the calibration header to the sensor. Calibration headers are available on request (support@consibio.com). Connect a tube between the calibration header and a gas cylinder with a suitable calibration standard (for example 500 ppm H2S in air, or 50 ppm H2S in air). We recommend a regulator with a fixed gas flow between 0.2 and 0.5 L/min during calibration.
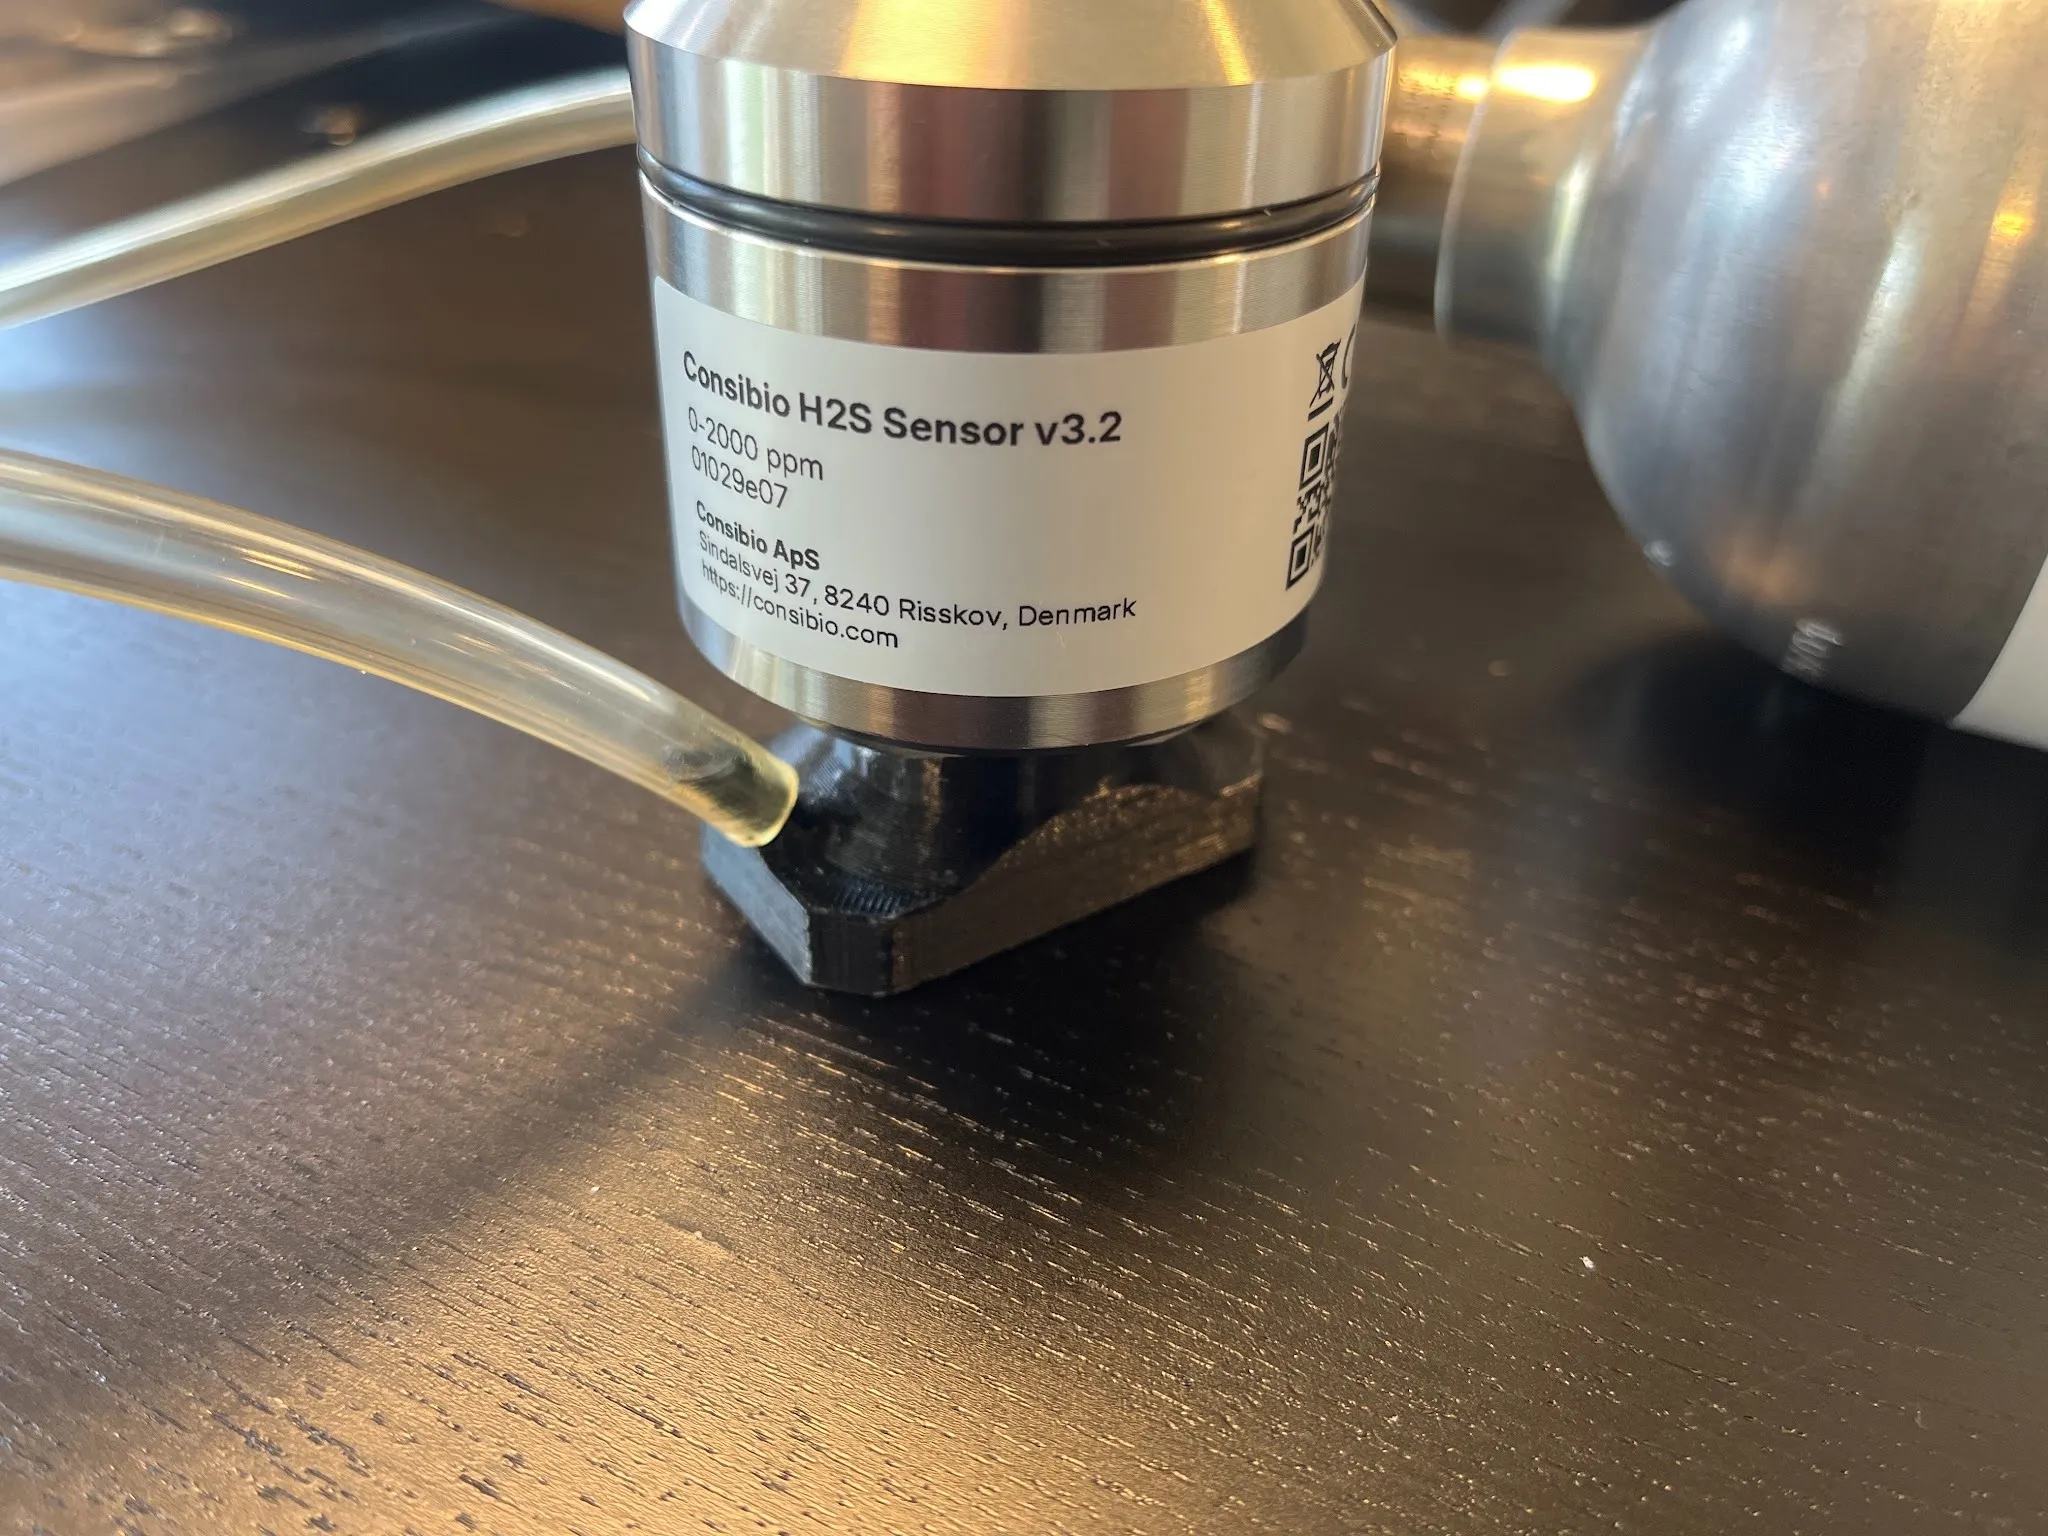
Open the valve on the gas cylinder and set a timer for 10 minutes while the sensor measures the calibration gas.
Turn off the gas
Section titled “Turn off the gas”After 10 mins, turn off the gas and disconnect the sensor from the calibration header. Move the sensor into fresh air and wait another 10 minutes while it collects a zero-point measurement. If you only want a 1-point calibration, you can skip this step to save time.
Apply the calibration in Consibio Cloud
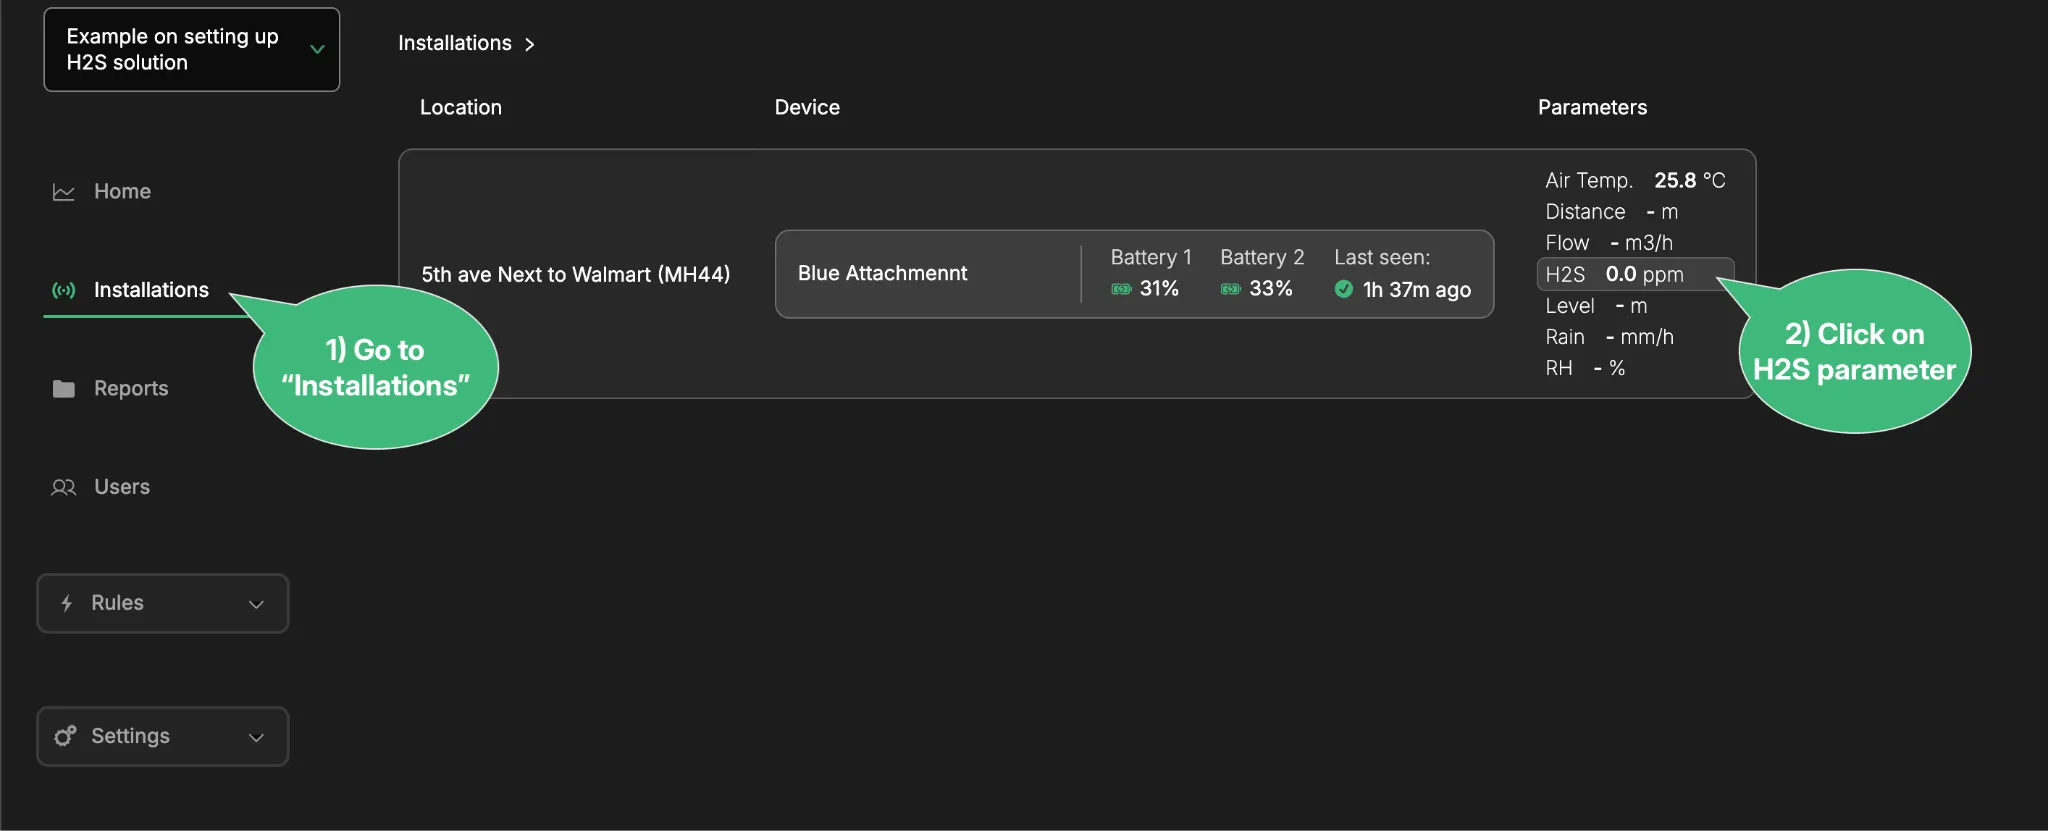
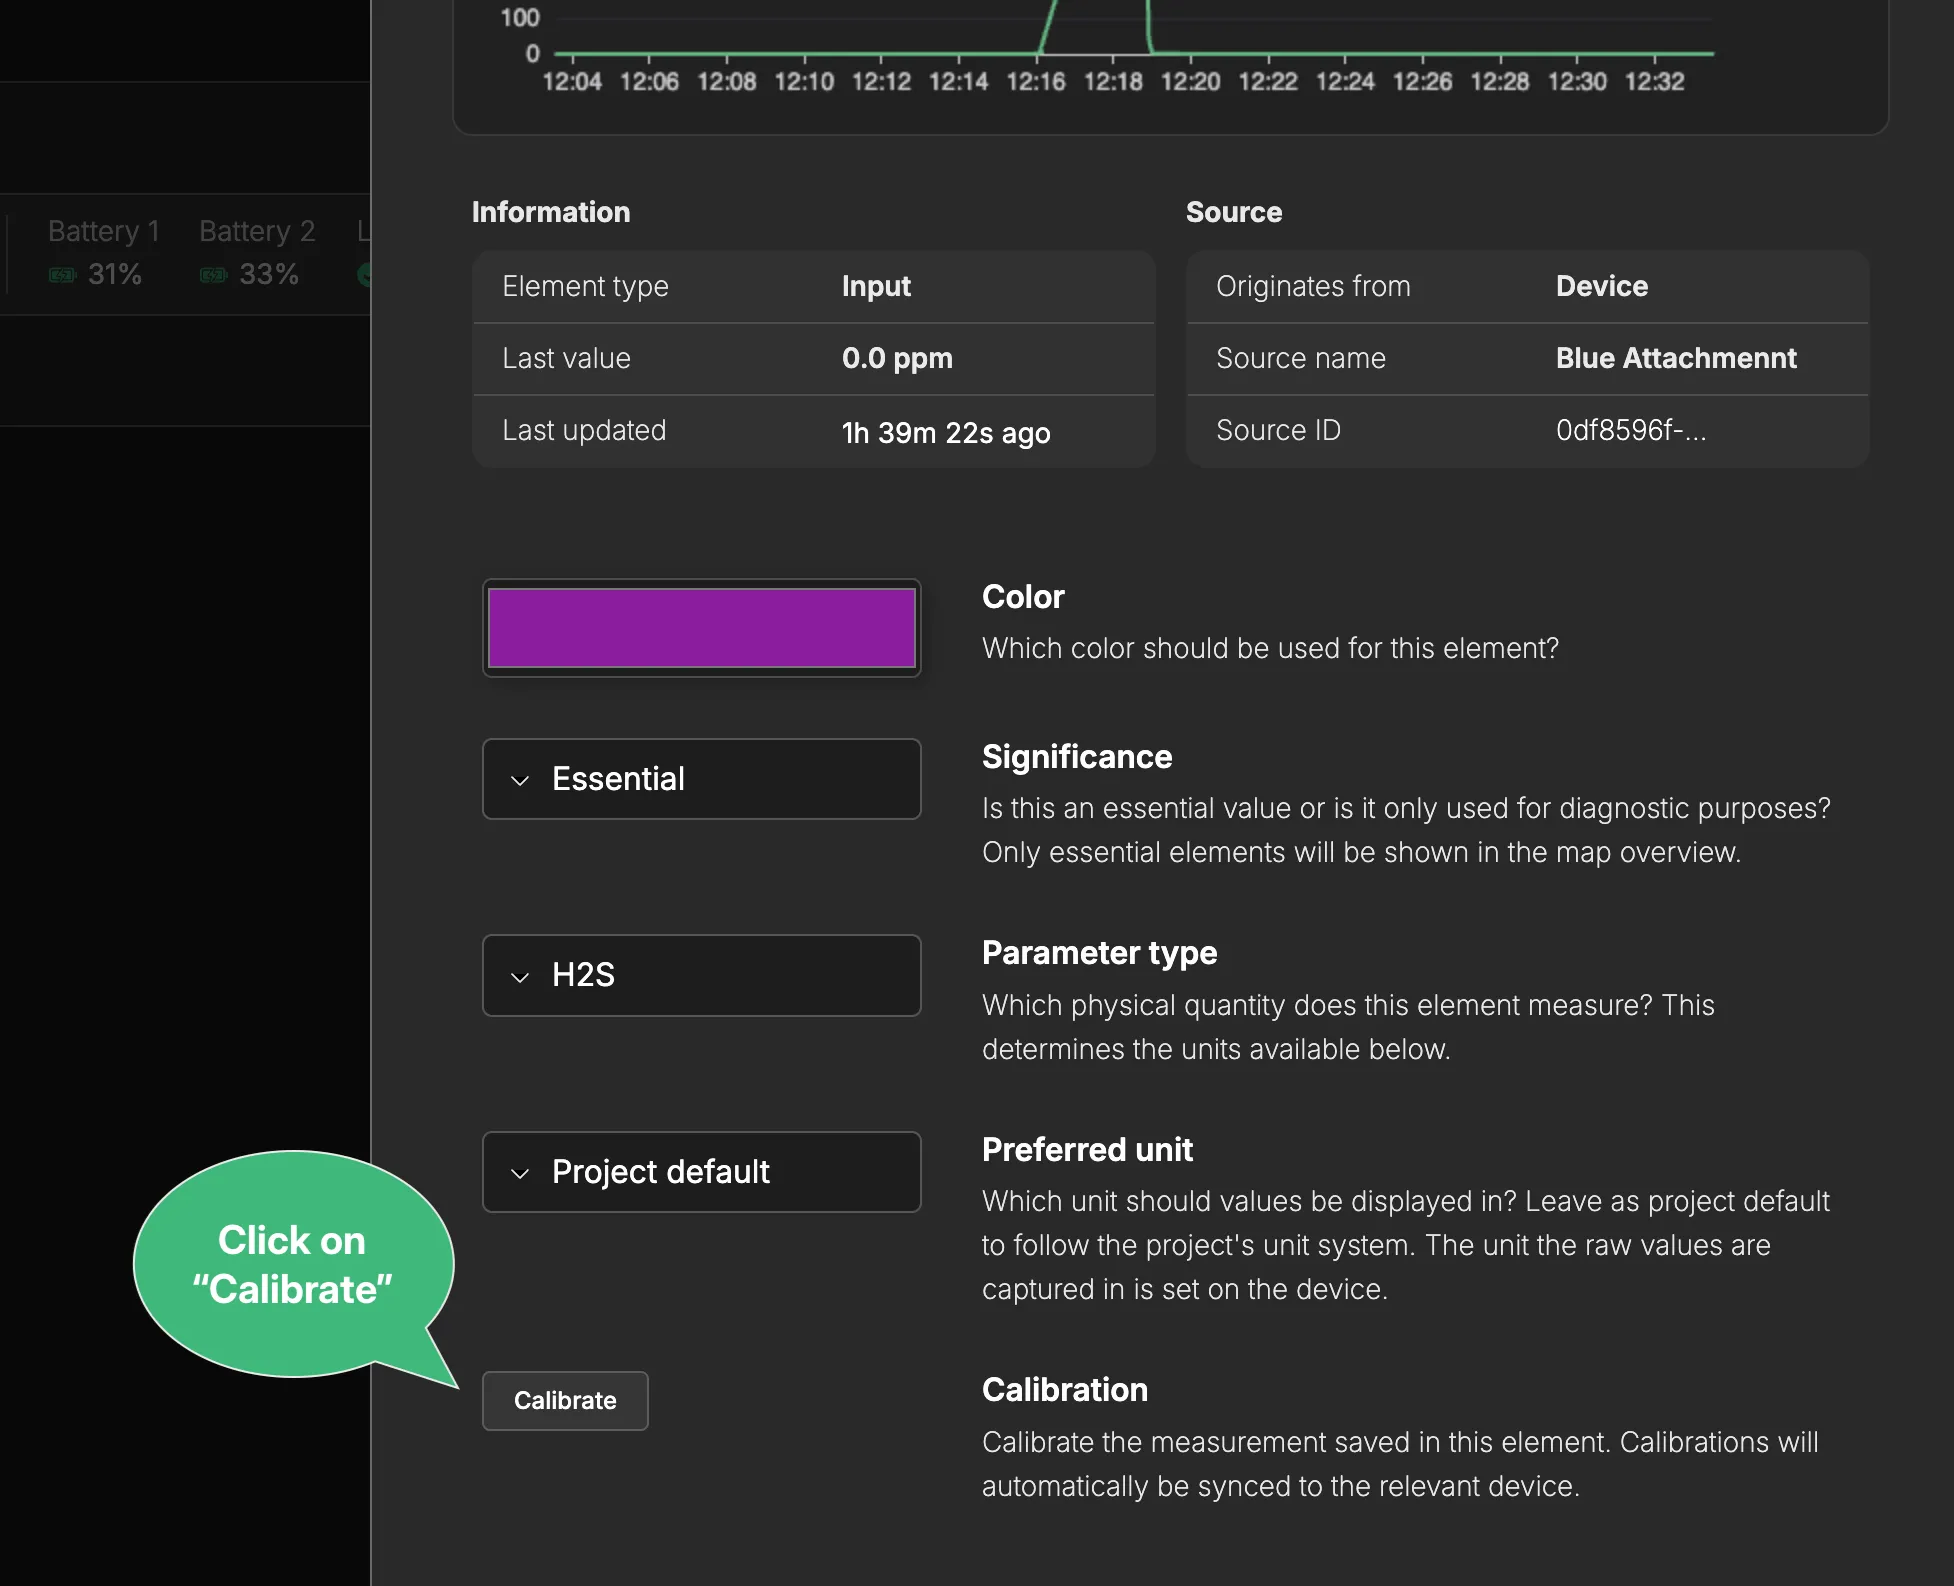
Section titled “Apply the calibration in Consibio Cloud”Open the Consibio Cloud dashboard at v3.consibio.cloud and log in to the project where the Logger is located. Go to the Installations tab and select the H2S parameter on the given location:
Select Calibrate:
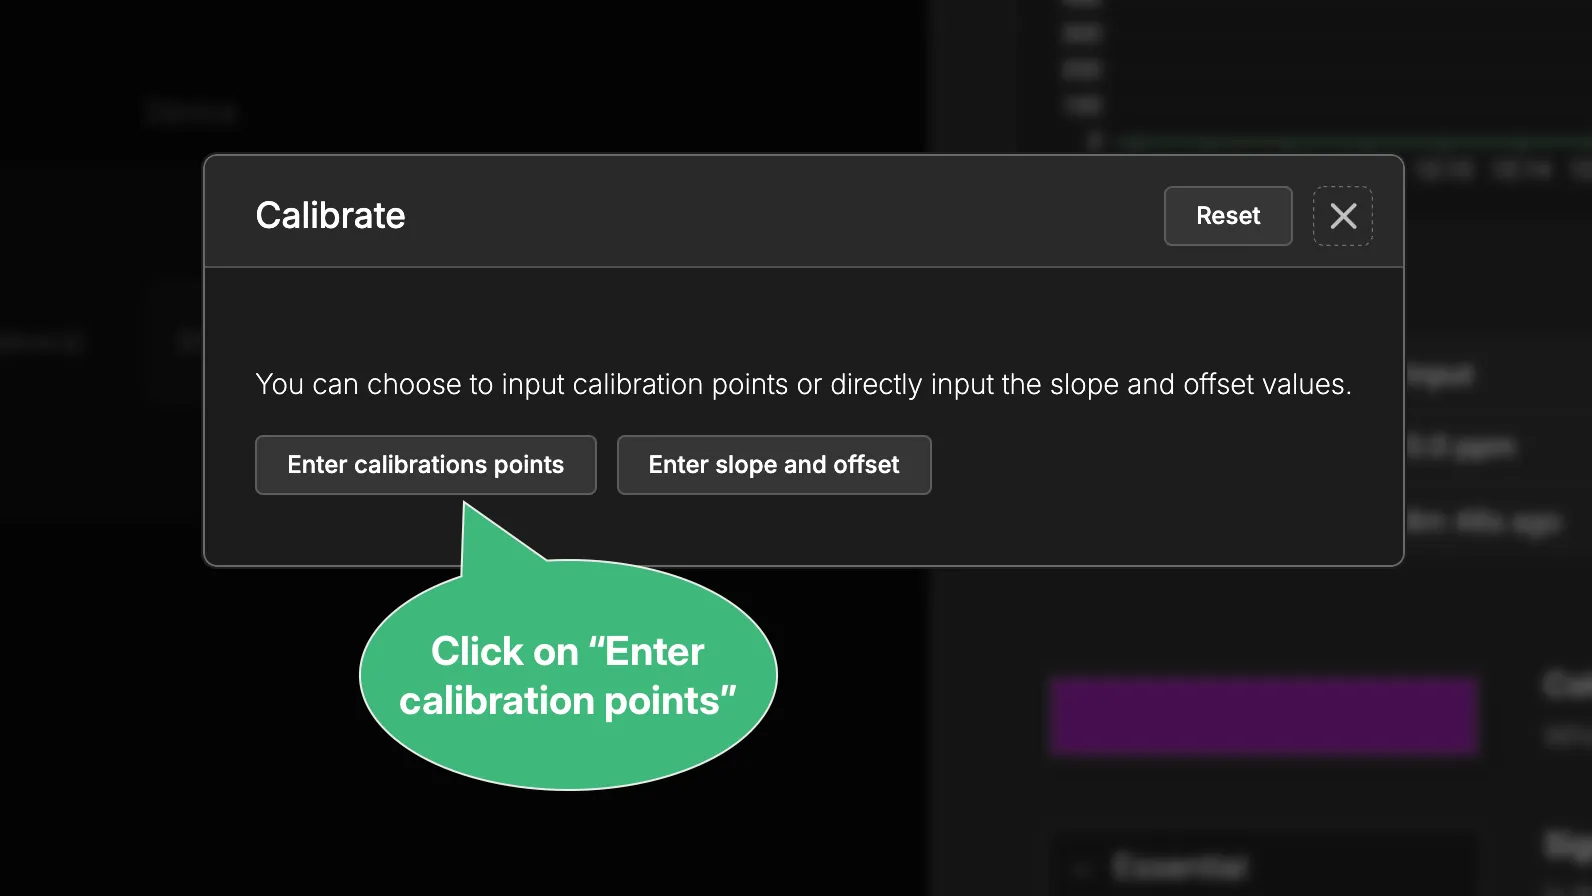
Select Enter calibration points:
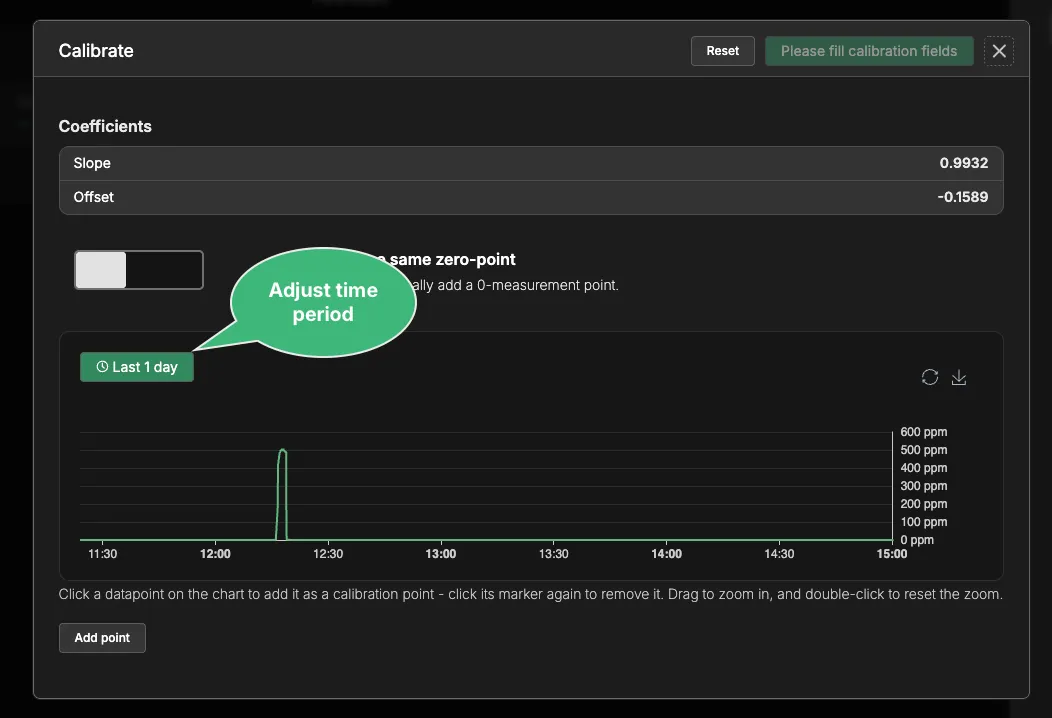
Select a time range in the chart that covers when the calibration was performed:
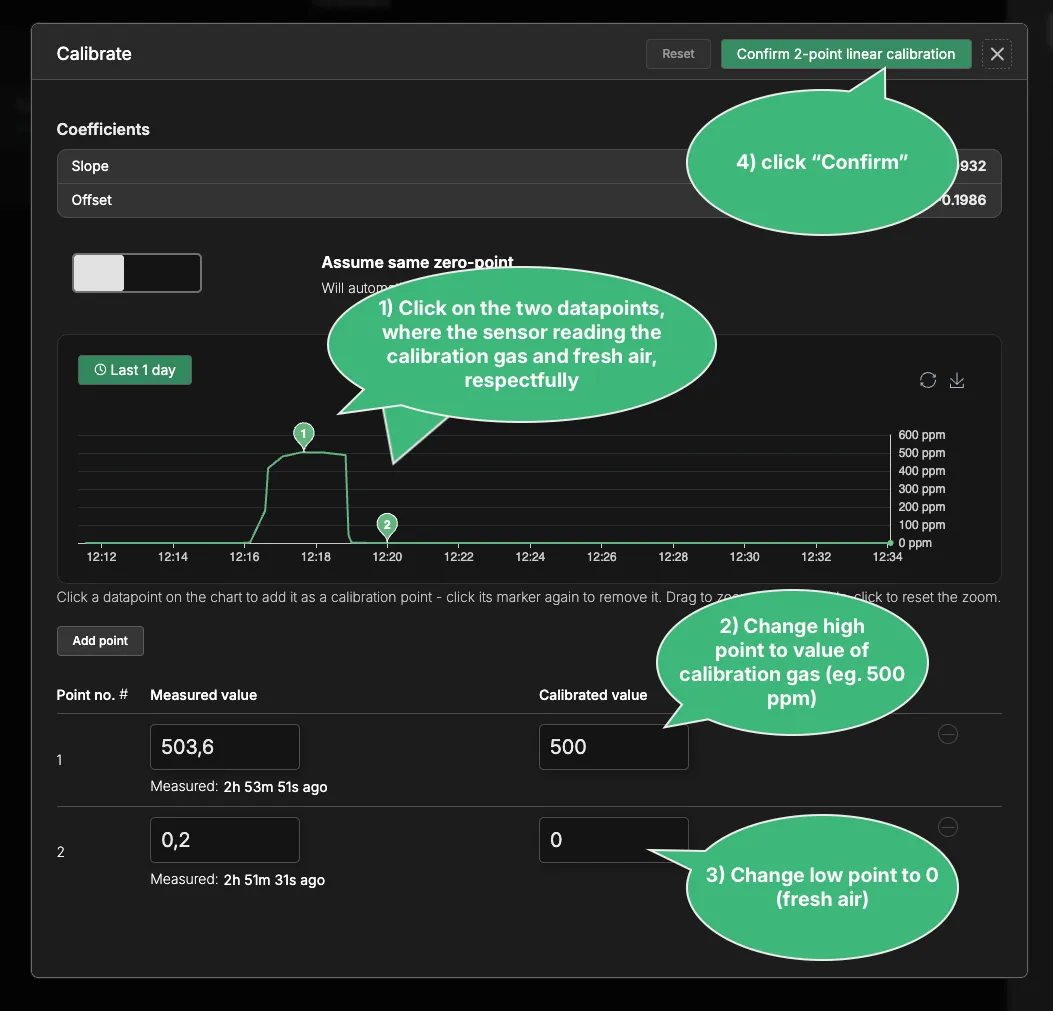
Mark the calibration points on the chart and enter the calibrated values:
- Click the two datapoints where the sensor was reading the calibration gas and fresh air, respectively. Each becomes a calibration point row below the chart.
- For the high point, change the Calibrated value to the value of the
calibration gas (for example
500ppm). - For the low point, change the Calibrated value to
0(fresh air). - Select Confirm (for example Confirm 2-point linear calibration).
The calibration is automatically synchronized to the Logger, which saves it inside the sensor. Subsequent readings are then based on the applied calibration.
If you have any questions, reach out to us at support@consibio.com.