

Calibrating velocity measurements
Download as PDFConsibio provides several solutions for measuring water level and flow. You get the most precise flow readings when you combine a level measurement with a direct measurement of the flow velocity — a full non-contact area-velocity flow meter setup with Consibio’s Advanced Flow solution.
The solution relies on two radars:
- A level radar that measures the distance from the installation point to the water surface.
- A surface velocity radar that measures the flow velocity of the water surface.
The setup is usually deploy-and-forget, but at some locations the surface velocity is measurably different from the average velocity in the channel because of the local geometry and flow conditions. In those cases you can calibrate the velocity reading to get the highest possible flow accuracy.
For the details of the calibration tool used in the last step, see Calibrating a sensor.
1. Go to the site
Section titled “1. Go to the site”Go to the site of the flow installation and bring a smartphone, tablet or laptop so you can access Consibio Cloud on the go.
2. Perform a reference measurement
Section titled “2. Perform a reference measurement”Measure the current velocity in the water stream with a handheld velocity meter. Any submersible water velocity meter can be used, but remember that the accuracy of the handheld instrument directly affects the accuracy of the calibration. An example of an appropriate instrument is the Flow Probe from YSI.
If possible, take the average of multiple readings at different depths and places in the stream to account for non-planar velocity profiles. Some handheld instruments can do this averaging for you automatically.
Note down this reading — you need it shortly.
3. Make the Logger send the latest value to Consibio Cloud
Section titled “3. Make the Logger send the latest value to Consibio Cloud”Now make the Logger take a measurement and send it immediately, so your reference measurement and the sensor measurement are captured at nearly the same time. To do that, activate Deploy Mode on the Logger:
- Press Restart shortly.
- Hold Deploy Mode for approximately 5s. When the LEDs flash quickly one at a time in a repeating pattern, Deploy Mode is activated.
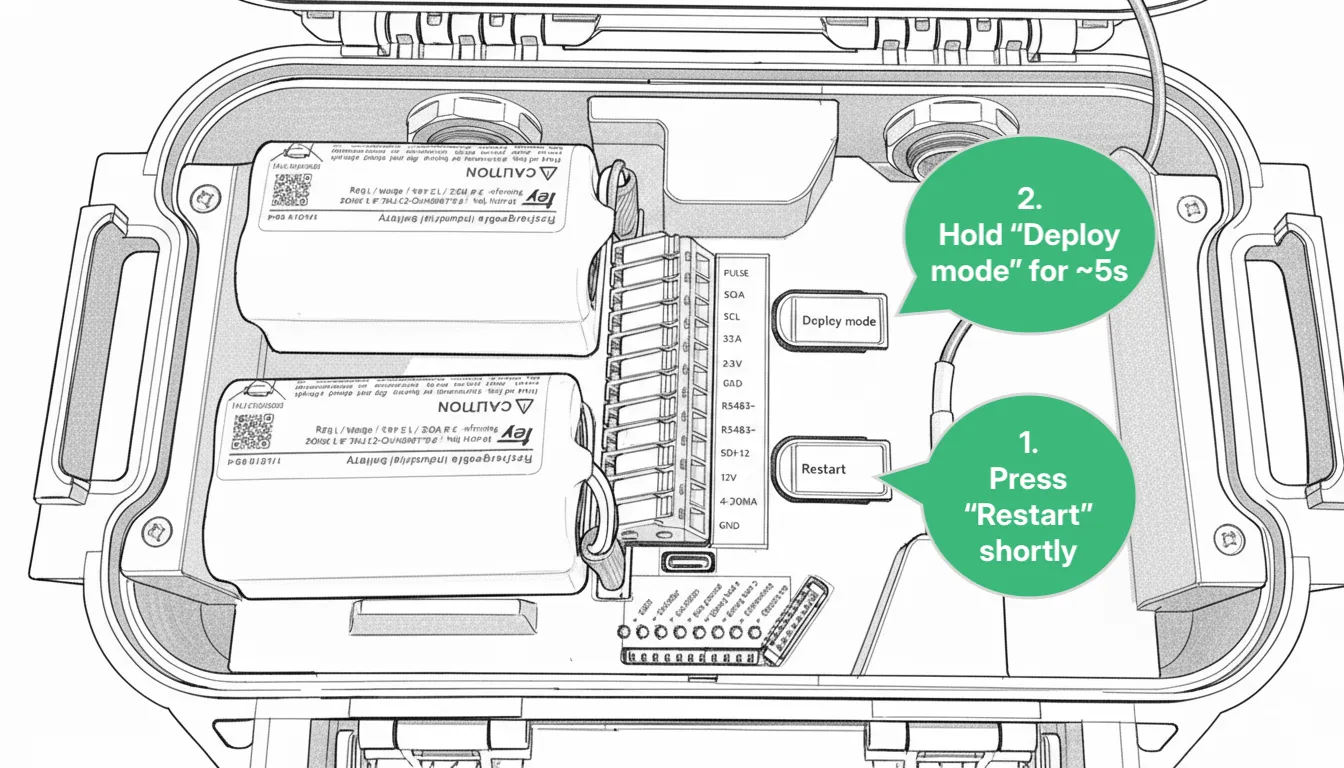
For the next 1 hour, the device makes a measurement every 30s and transmits every 5 mins. After 1 hour, it reverts to the transmission and measurement interval configured in Consibio Cloud. If the Logger has not connected on this physical site before, opening the connection can take some minutes on the first attempt.
4. Enter the calibration in Consibio Cloud
Section titled “4. Enter the calibration in Consibio Cloud”Open Consibio Cloud at v3.consibio.cloud and open the project you use for this setup. (You can also install Consibio Cloud as an app.)
Go to the Elements tab and find the velocity element for this location. If the project has many elements, use the search filters at the top and search for “Velocity” or similar.
Select the element, scroll to the bottom and select Calibrate:
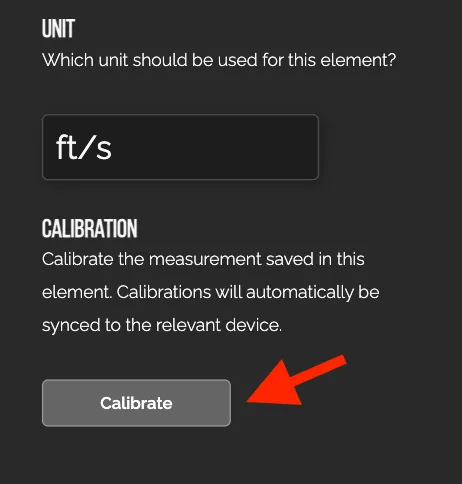
Select Enter calibration points:
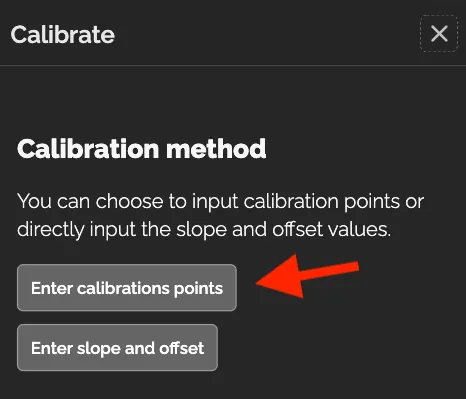
Under Measured value, the most recent value shows up automatically:
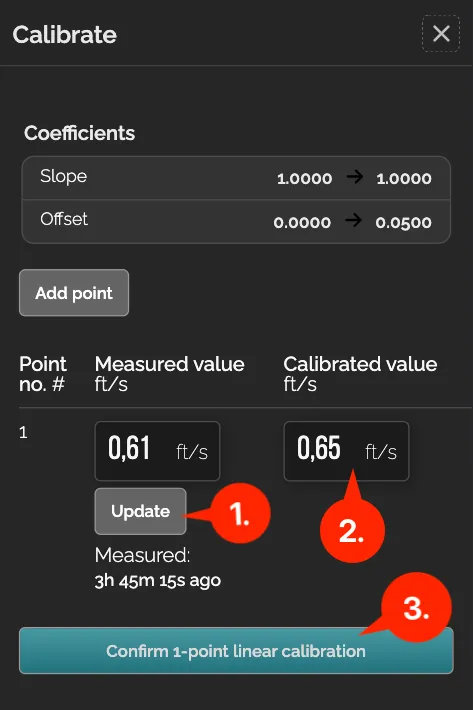
- If you just forced the Logger to transmit (step 3), it can take a couple of minutes to connect, depending on local coverage. Until then the latest value might be several hours old. Wait a minute and select Update to pull the latest value.
- Under Calibrated value, enter the averaged velocity you measured in step 2.
- Select Confirm 1-point linear calibration.
That’s it — the calibration is saved in Consibio Cloud. The next time the Logger connects, it receives the new calibration and uses it from then on.
If you have any questions, reach out to us at support@consibio.com.