

Calibrating the MJK Phix pH probe
Download as PDFpH sensors must be calibrated at regular intervals to provide an accurate reading. Follow the steps below to calibrate an MJK Phix pH probe while it is connected to a Consibio Logger.
The calibration is performed on the probe itself, using the calibration ring and two buffer solutions. The Logger only needs to supply constant power while you work.
What you need
Section titled “What you need”- Deionized water to rinse the probe.
- A calibration buffer solution with pH 7.0.
- A calibration buffer solution with pH 4.0.
- A soft cloth that will not scratch the electrode.
1. Keep the Logger powered up
Section titled “1. Keep the Logger powered up”During normal operation, the Logger powers the sensor up and down with every measurement to preserve battery. That interferes with the calibration procedure, so put the Logger into a configuration where it stays online:
-
Open the device in Consibio Cloud, set the Transmission interval to 0 seconds and select Save. At
0s, the device attempts to stay online indefinitely.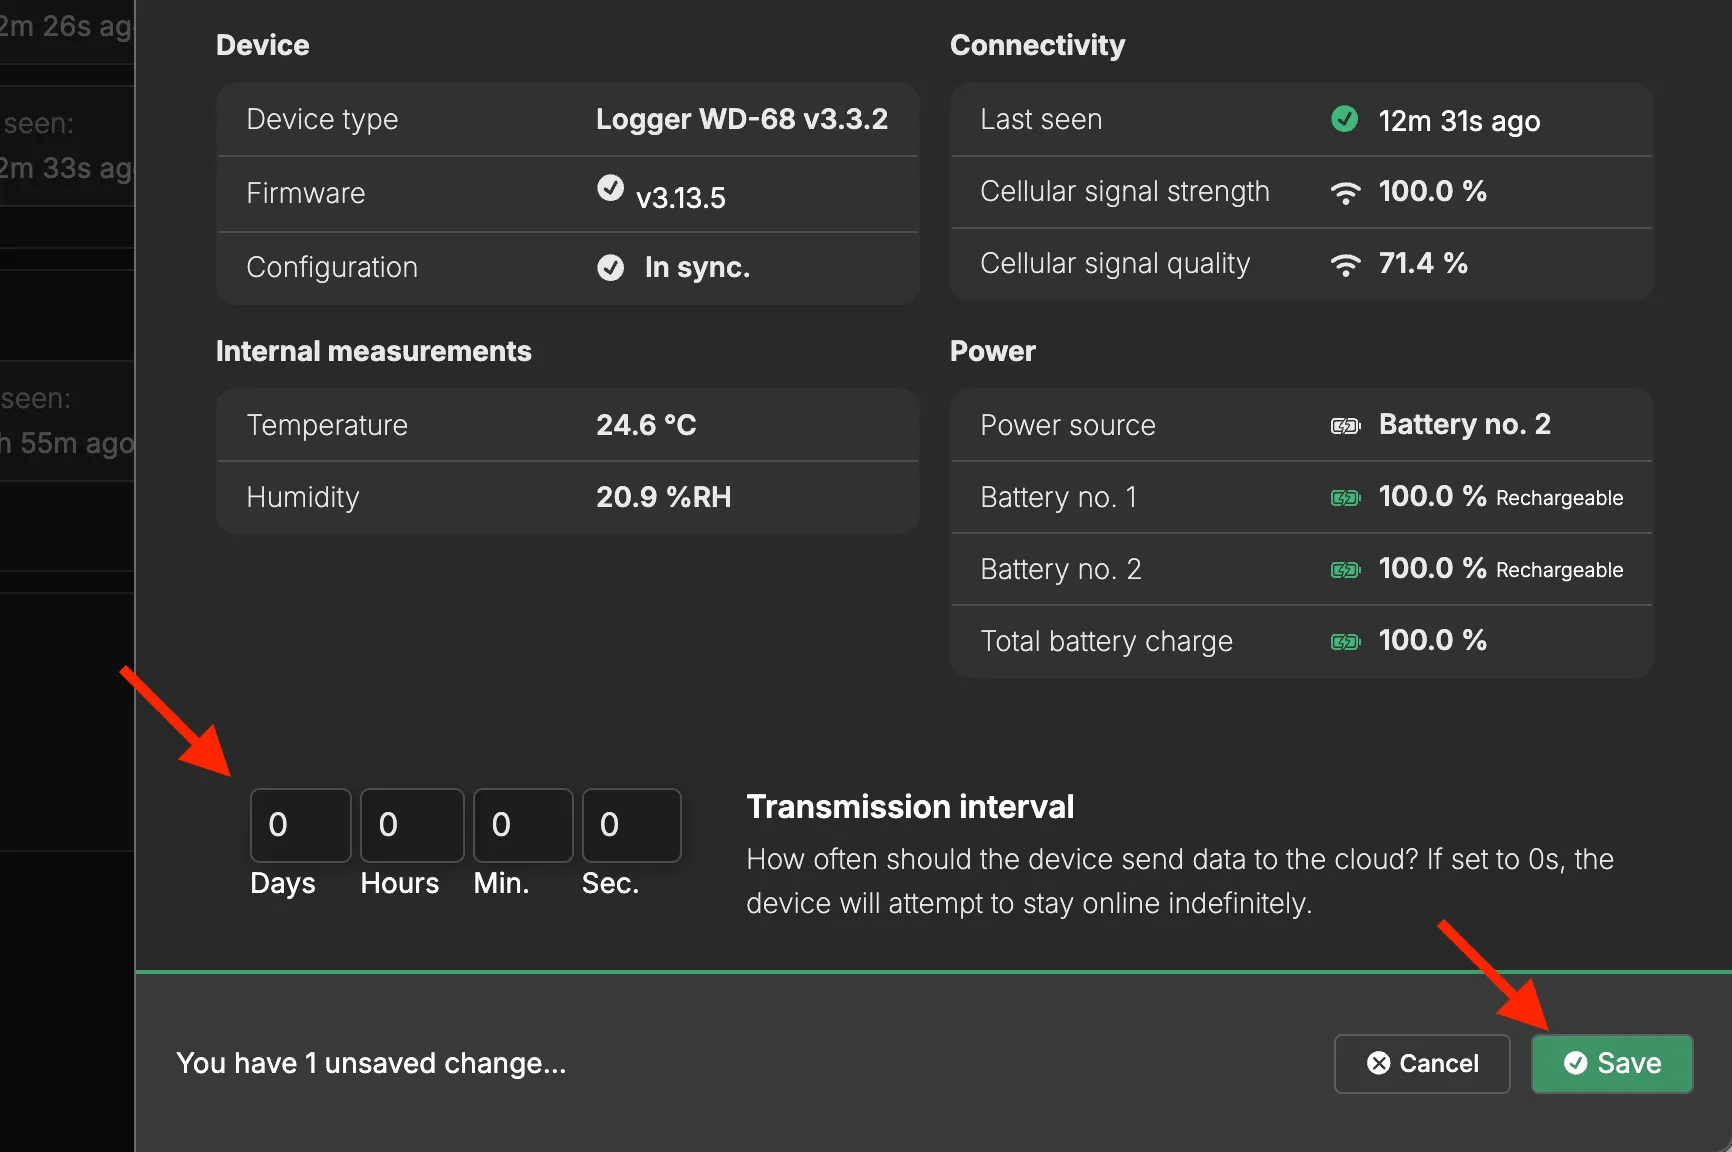
-
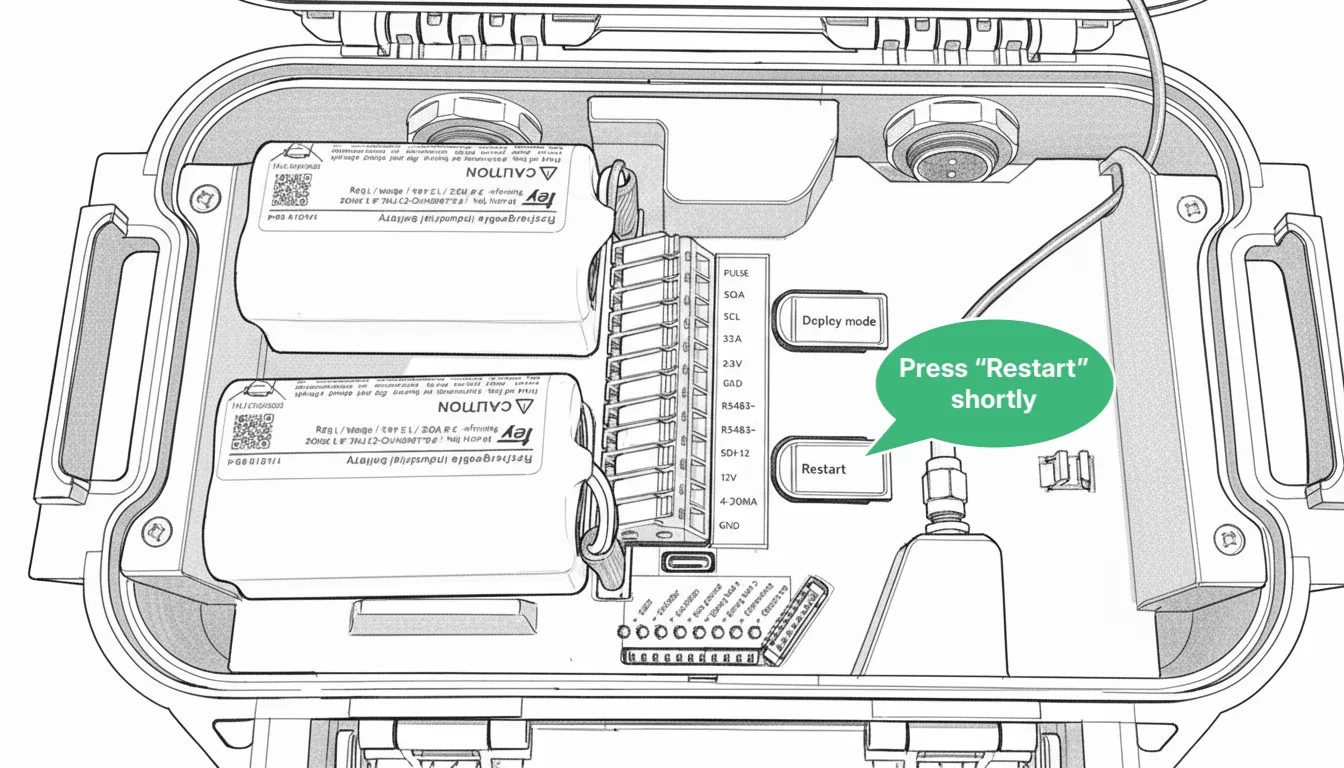
Press Restart shortly on the Logger to force a restart and an immediate connection, so the new setting is synchronized to the device right away.
-
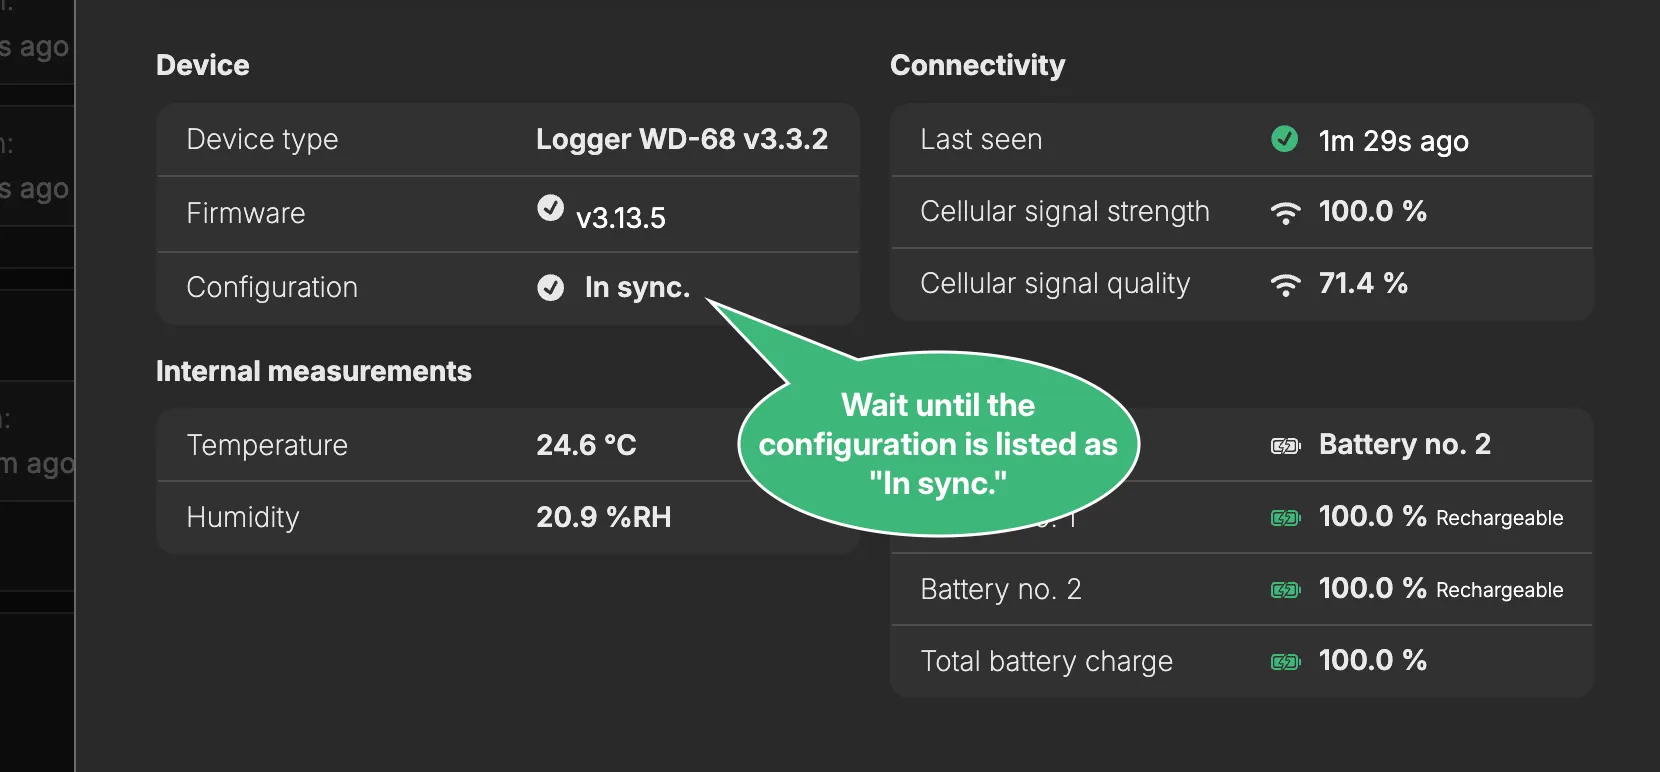
Wait until Configuration is listed as In sync. in Consibio Cloud. This can take a couple of minutes.
-
Wait at least 10 minutes for the sensor to stabilize.
For more about the interval settings, see Logger WD-68.
2. Calibrate at pH 7
Section titled “2. Calibrate at pH 7”-
Clean the sensor carefully in deionized water, then dry the electrode with a soft cloth.
-
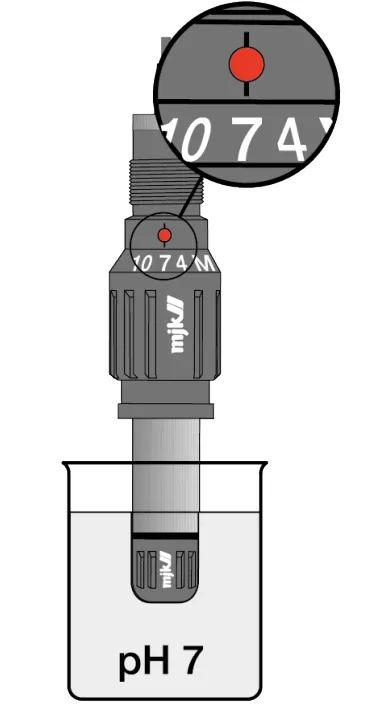
Turn the calibration ring to the 7 indicator position and submerge the probe in the pH 7 buffer solution.
-
The sensor begins to blink 3 times every 5 seconds.
-
Wait until the sensor blinks 2 times every 5 seconds. The first calibration value is now saved.
3. Calibrate at pH 4
Section titled “3. Calibrate at pH 4”-
Take the sensor out of the buffer solution and dry the electrode with a soft cloth.
-
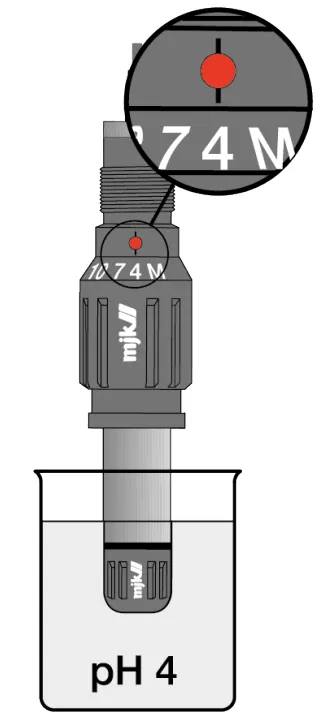
Turn the calibration ring from the 7 to the 4 indicator position and submerge the probe in the pH 4 buffer solution.
-
The sensor begins to blink 3 times every 5 seconds.
-
Wait until the sensor blinks 2 times every 5 seconds. The second calibration value is now saved.
4. Return the probe to measuring
Section titled “4. Return the probe to measuring”Turn the calibration ring to the M (Measure) indicator position.
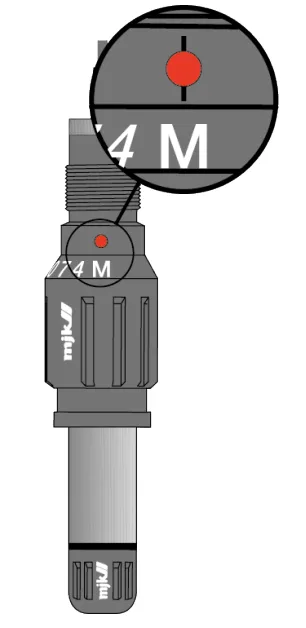
The sensor is now calibrated.
5. Restore the transmission interval
Section titled “5. Restore the transmission interval”Set the Transmission interval back to the value you want the Logger to run with, and select Save.
If you have any questions, reach out to us at support@consibio.com.